Purple eyes are one of the most captivating and rare traits you can capture on paper. While violet eyes do exist in reality—most famously associated with Hollywood legend Elizabeth Taylor—they possess an ethereal, mystical quality that makes them a favorite subject in fantasy, anime, and realistic portraiture.
Whether you are building an art portfolio, designing a unique fantasy character, or exploring eye anatomy tutorials, mastering a natural purple eyes drawing requires a delicate balance of realism, layering, and color theory.
This comprehensive guide walks you through the essential tools, fundamental anatomy, color blending techniques, and step-by-step instructions to create a stunning, lifelike purple eye that immediately draws viewers in. 1. Essential Tools and Materials
Before putting pencil to paper, gathering the right materials ensures smooth blending and crisp highlights. Because purple sits delicately on the color wheel between blue and red, achieving a natural look requires mediums that allow for soft gradients.
- Drawing Pencils: 2H (for light initial sketching), HB (for mid-tones), and 2B or 4B (for deep shadows around the eyelids and pupil).
- Color Mediums: A quality set of colored pencils (polychromos or soft-core wax pencils work best) featuring shades of lavender, deep violet, magenta, ultramarine blue, and warm ochre.
- Blending Tools: Blending stumps (tortillions) or cotton swabs for smooth skin gradients.
- Highlights: A white gel pen (such as a Gelly Roll) or an electric eraser for sharp, pinpoint light reflections.
- Paper: Heavyweight smooth drawing paper or Bristol board (vortex or smooth surface) to prevent pencil texture from interrupting fine details.
2. Understanding Eye Anatomy for Realism
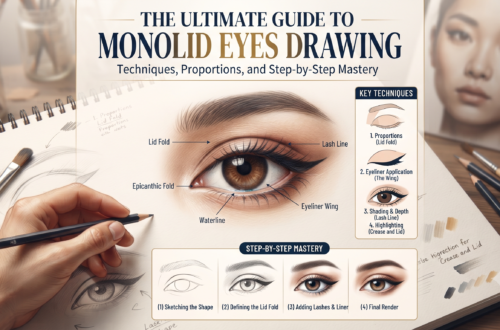
Even when drawing a stylized or fantastical feature like purple eyes, adherence to drawing fundamentals and anatomical structure is what separates amateur sketches from professional artwork.
+-------------------------------------------------------------+
|                     ANATOMICAL CHECKLIST                    |
+-------------------------------------------------------------+
| * Sclera: Never pure white; shaded with gray/pink tones.    |
| * Iris: A circular disk featuring radiating fibers (trabeculae).|
| * Pupil: The absolute darkest point, centered in the iris.  |
| * Eyelids: Have thickness, casting a soft shadow on the eyeball.|
| * Tear Duct (Caruncle): Contains fleshy pink and peach tones.|
+-------------------------------------------------------------+
The Sclera is Not Pure White
Beginners often color the whites of the eyes stark white. In reality, the eyeball is a sphere. The upper eyelid casts a natural shadow across the top portion of the sclera, requiring soft shading using cool grays or pale lavender-grays.
Iris Fiber Patterns
The iris is not a flat pool of color. It consists of tiny muscle fibers (trabeculae) that radiate outward from the pupil like spokes on a wheel. Incorporating these directional strokes is essential for depth.
3. Step-by-Step Guide to Drawing Natural Purple Eyes
Follow this structured, multi-phase process to build your drawing from a simple outline to a hyper-realistic masterpiece.
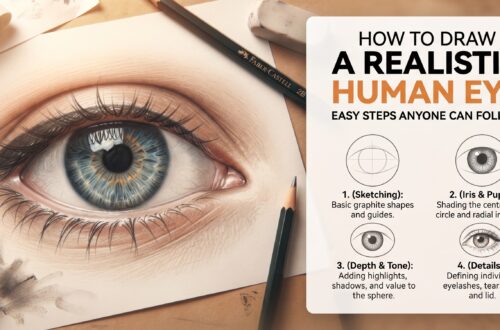
Step 1: The Outlines and Proportions
Start with a light 2H pencil to map out the foundational shapes.
- Draw a gently curved almond shape for the overall eye opening. Remember that the highest point of the upper eyelid is usually slightly inner-centered, not dead middle.
- Outline the thickness of both the upper and lower eyelids. Double lines here add immediate realism.
- Lightly sketch a complete circle for the iris, ensuring a small portion of it is covered by the upper eyelid.
- Draw a smaller, perfect circle in the exact center for the pupil.
Step 2: Shading the Base and Shadows
Before introducing color, establish your value scale using an HB pencil.
- Shade the deepest part of the pupil, leaving a blank space for your primary highlight.
- Darken the upper eyelid crease firmly, as this area recedes and holds the heaviest shadow.
- Lightly shade the corners of the eye and the tear duct area, introducing soft gradients along the lower lash line.
Step 3: Layering the Violet Iris Base
To keep the purple eyes looking natural rather than overly artificial, you must layer warm and cool undertones.
- Lightly lay down a base of soft lavender or periwinkle across the entire iris, avoiding your highlight spots.
- Introduce faint touches of warm brown or hazel near the inner pupil border. Real eyes almost always feature a warm ring (heterochromia centralis) around the pupil, which makes cool colors like purple pop dynamically.
- Using a sharpened magenta or deep violet pencil, draw fine, radiating lines outward from the pupil toward the outer edge of the iris (limbal ring).
Step 4: Deepening Depth and Contrast
Realism relies on contrast.
- Darken the outer perimeter of the iris (the limbal ring) with a deep indigo or dark purple. This frames the eye and gives it a glossy, three-dimensional dome effect.
- Deepen the shadow cast by the upper eyelid onto the top portion of the iris. This creates the illusion that the eye is set deep within the eye socket beneath a physical brow bone.
Step 5: Highlights and Finishing Touches
The final step brings the drawing to life through light reflection.
- Use your white gel pen to place a crisp, bright white dot or oval over the edge where the pupil and iris meet. Add a secondary, softer reflection opposite the main light source to simulate ambient room light.
- Refine the eyelashes. Draw long, tapered eyelashes that curve upward on the top lid and shorter, sparser lashes on the bottom lid. Ensure they cast faint shadows onto the skin and sclera.
- Soften the surrounding skin texture using a blending stump, adding subtle pink and peach undertones to the tear duct and lash lines.
4. Pro Tips for Perfecting Your Art
- Control Your Pressure: When working with colored pencils, build up tones through multiple light layers rather than pressing hard all at once. Heavy pressure flattens the paper tooth, making further blending impossible.
- Keep Your Edges Clean: Use a kneaded eraser to lift away stray graphite or pigment smudges around the eye borders, keeping the surrounding skin clean and luminous.
- Reference Real Anatomy: Even though purple eyes are rare, studying high-resolution macro photography of green, blue, and hazel eyes will teach you how light interacts with iris fibers and moisture.
By combining strict anatomical structure with careful color layering, your natural purple eyes drawing will achieve a breathtaking, lifelike depth that stands out in any art collection. Grab your pencils, take your time with the gradients, and enjoy bringing this striking gaze to life!