Capturing the captivating innocence, depth, and striking color of a child’s gaze is one of the most rewarding challenges for any artist. A well-executed baby blue eyes drawing requires more than just sketching an oval and filling it in with blue. It demands an understanding of light reflection, soft transitions, the translucency of the iris, and the delicate wetness of the eye structure.
Whether you are working with graphite, colored pencils, or digital mediums, this comprehensive guide will walk you through the anatomy, tools, and precise step-by-step process needed to bring vibrant, lifelike baby blue eyes to life on paper.
Understanding the Anatomy Before You Draw
Before putting pencil to paper, it is essential to understand what makes a baby’s eyes unique compared to adult eyes.
- Proportions: Children and babies have proportionately larger eyes relative to their skull size. The iris and pupil often take up a much larger space within the eye opening, which naturally conveys a sense of innocence and wonder.
- Soft Contours: Unlike adults, who often have prominent eyelid creases, sharp bone structure, and defined eyelashes, babies feature smooth, plump skin around the eyes with very subtle transitions.
- The Iris Texture: Infant eyes often feature a crystalline, clear blue tone. Because melanin levels are lower, the fibers of the iris appear soft, delicate, and feathery rather than coarse or deeply grooved.
Essential Materials for Your Artwork
To achieve a realistic, high-detail finish, gathering the right supplies is crucial. Depending on your preferred medium, keep the following handy:
- Drawing Surface: Heavyweight smooth Bristol paper (such as 100+ lb) or hot-press watercolor paper. Smooth surfaces allow for seamless blending of colored pencils and fine graphite detail.
- Pencils:
- Graphite set (2H for light guidelines, HB for mid-tones, 2B/4B for dark pupils and lashes).
- Colored pencils for a vibrant baby blue eyes drawing (include light cerulean, ultramarine, white, warm gray, burnt sienna, and dark indigo).
- Blending Tools: Tortillions, cotton swabs, or a soft makeup brush for smooth gradients.
- Highlights: A white gel pen (like a Sakura Gelly Roll) or an electric eraser for pinpoint precision on specular highlights.
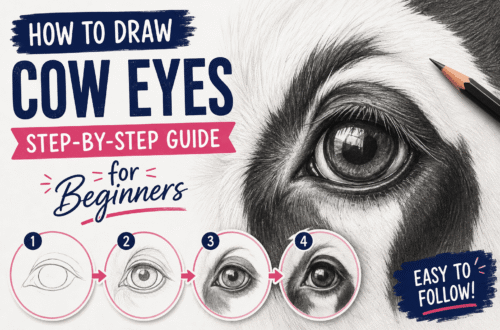
Step-by-Step Guide: Creating a Stunning Baby Blue Eyes Drawing
Follow these structured steps to build your drawing from a simple foundational sketch to a fully rendered, luminous masterpiece.
Step 1: Mapping the Basic Outlines and Proportions
Begin with light, sweeping lines using a hard 2H pencil so you can easily erase mistakes.
- The Shape: Draw a soft, almond-like shape that arches slightly higher at the top than the bottom. Remember that baby eyes are rounder and wider than adult eyes.
- Placement: Lightly sketch a large, perfect circle inside for the iris. Inside the iris, draw a smaller, perfectly centered circle for the pupil.
- Eyelids and Folds: Add a gentle, single line above the upper eye to indicate the upper eyelid. Keep it soft—avoid harsh shadows or heavy creases. Indicate the tear duct gently in the inner corner.
Step 2: Establishing Values and the Pupil
The pupil is the darkest point of any eye drawing and anchors the entire piece.
- Darkening the Pupil: Using your softest pencil (4B or a rich black colored pencil), fill in the pupil completely.
- Leaving Highlight Spaces: Crucially, leave tiny, uncolored circular or oval voids inside the pupil and upper iris. These represent the primary light sources (specular highlights) reflecting off the surface of the eye. Without these, your baby blue eyes drawing will look flat and lifeless.
Step 3: Layering the Base Tones for Baby Blue Eyes
Babies’ eyes are rarely just one flat shade of blue. They feature a mix of cyan, sky blue, and subtle hints of warm undertones near the pupil.
- Light Wash/First Layer: Lay down a very light layer of sky blue or cerulean across the entire iris, avoiding your highlight zones. Use gentle, radiating strokes moving outward from the pupil toward the outer edge of the iris (the limbal ring).
- Adding Depth: Introduce a slightly deeper ultramarine or cobalt blue around the outer perimeter of the iris to create a natural gradient. This forms the dark border known as the limbal ring, which makes the blue pop dramatically.
Step 4: Rendering Details and Iris Fibers
Realism comes from texture. The iris is made of tiny muscle fibers that expand and contract.
- Fibers and Patterns: Using a sharp blue colored pencil or a fine-tip graphite pencil, draw delicate lines radiating outward from the pupil. Vary the pressure so some lines are bold while others fade into the background.
- Warm Undertones: Near the inner edge of the iris (collarette), lightly layer a touch of pale yellow-ochre or burnt sienna. Infants often have warm amber or golden specks surrounding the pupil, which creates a stunning contrast against the cool baby blue.
Step 5: Shading the Whites of the Eyes (Sclera) and Eyelids
The sclera is never pure, glowing white; it is a spherical 3D surface subject to shadows and moisture.
- Shading the Sclera: Use cool grays, soft blues, and subtle pinks/purples to shade the corners of the eye. The upper portion of the sclera should feature a darker shadow cast by the upper eyelid.
- The Wet Rim: Add a thin, crisp white line along the lower waterline of the eye to simulate moisture. This reflective strip is a secret weapon for realism.
- Skin Tones Around the Eye: Softly shade the skin above and below the eye. Blend flesh tones, pinks, and warm peach shades to give the baby’s skin a healthy, soft glow. Keep shadows around the tear duct delicate and smooth.
Step 6: Drawing Soft Eyelashes and Eyebrows
Baby eyelashes are fine, wispy, and taper off softly rather than being thick, dark, and clumpy.
- Eyelashes: Using a sharp pencil, flick outward and upward from the edge of the upper eyelid. Make sure the strokes start thick at the base and taper to an invisible point. Avoid making them too uniform—natural lashes cross over one another slightly.
- Lower Lashes: Draw sparse, very faint, short hairs along the lower lid.
- Eyebrows: If visible in your composition, sketch ultra-fine, feathery strokes following the natural growth direction of baby brow hairs. Keep them light and airy.
Pro Tips for Elevating Your Drawing
- Preserve Your Highlights: Never underestimate the power of pure white. If you accidentally color over your highlights, use a precision electric eraser or a opaque white gel pen to pull them back out.
- Control Your Edges: Hard edges draw the viewer’s eye immediately, while soft edges recede. Keep the transition between the iris and the sclera relatively sharp, but soften the outer skin boundaries.
- Patience with Layering: Build color gradually. Heavy-handed coloring right from the start prevents you from blending smooth gradients and capturing the translucent quality of infant eyes.
Conclusion
Mastering a baby blue eyes drawing is an exercise in patience, observation, and delicate layering. By focusing on soft transitions, preserving bright light reflections, and combining subtle warm tones with vibrant blues, you can capture the undeniable depth and innocence of an infant’s gaze. Practice these steps patiently on your next art piece, and watch your portraits come alive with emotion and realism.