Introduction
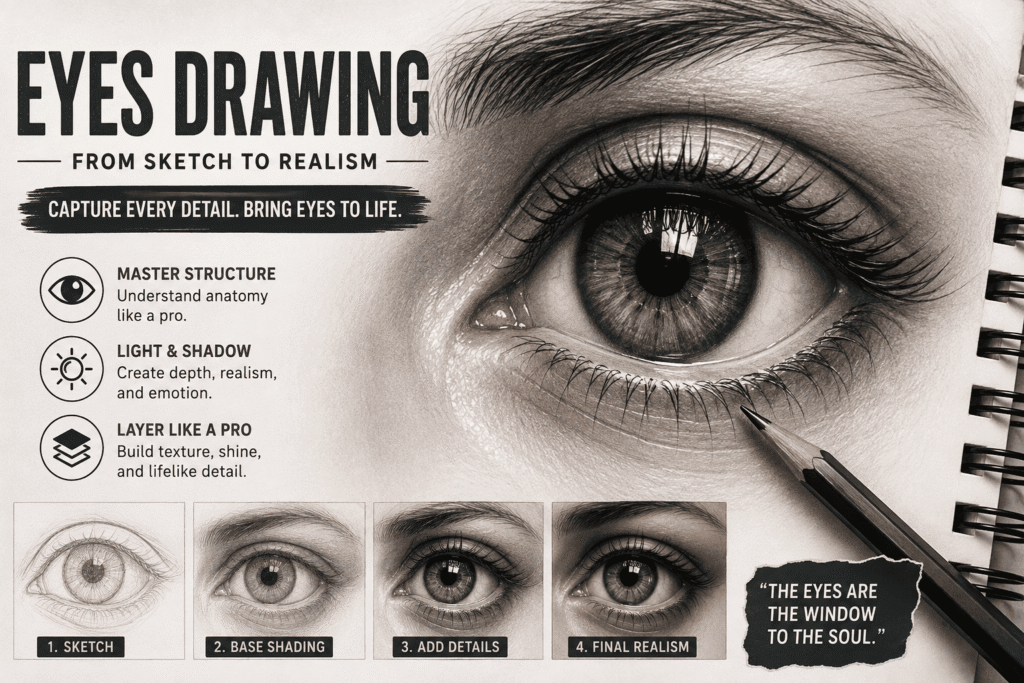
Have you ever spent hours working on a portrait, only to feel like the eyes look flat, lifeless, or stuck in a cartoon world? You are not alone. As the old saying goes, the eyes are the window to the soul—and in artwork, they are the single defining feature that can make or break an entire drawing.
Capturing the glossy sheen of the cornea, the complex depth of the iris, and the natural curvature of the eyelids is what separates a quick sketch from a breathtaking, photorealistic masterpiece. But here is the secret most top portrait artists won’t tell you: drawing realistic eyes isn’t about raw talent—it’s about mastering structure, lighting, and layering.
1. Essential Tools and Materials You Need
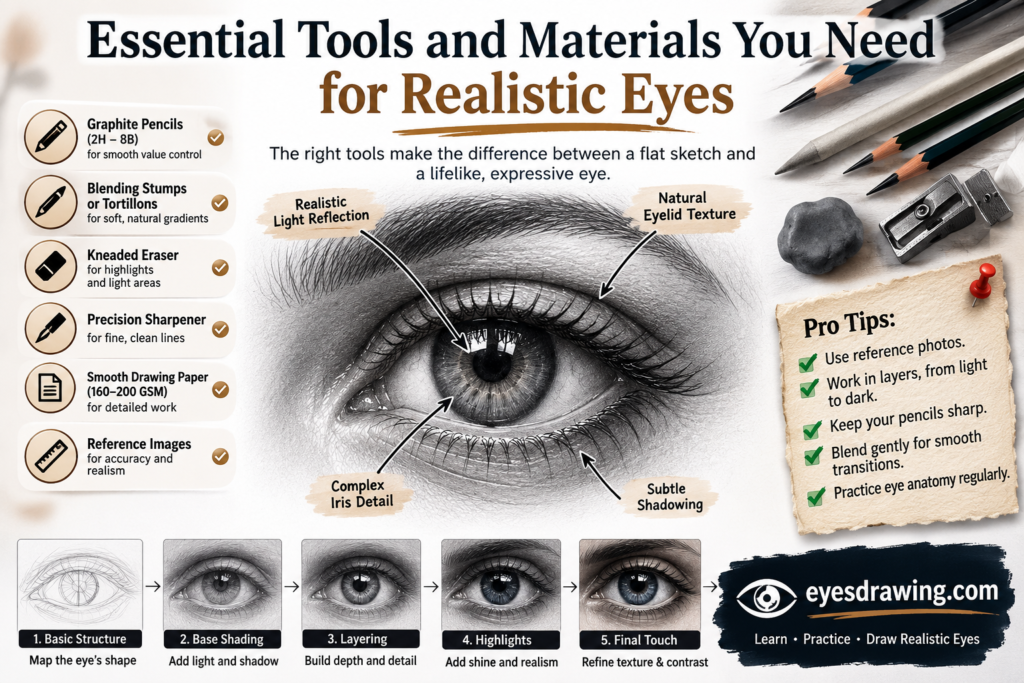
Before you put pencil to paper, setting up the right toolkit makes a dramatic difference in how smooth your gradients and deep your shadows look.
Choosing the Right Graphite Pencils
You cannot achieve rich realism with just a standard HB pencil. Build a balanced range with these grades:
- HB or 2H: Perfect for light layout sketching, mapping proportions, and fine guidelines that can be easily erased.
- 2B to 4B: Your mid-tone workhorses for building soft shadows around the eyelids and skin creases.
- 6B to 8B: Essential for achieving deep, pitch-black values, especially inside the pupil and the darkest corners of the upper lash line.
Erasers and Blending Gear
- Kneaded Eraser: Moldable and gentle, ideal for lifting out subtle graphite highlights without damaging your paper fiber.
- Electric Precision Eraser: A game-changer for carving out sharp, ultra-thin light streaks in eyelashes and iris catchlights.
- Blending Stumps & Brushes: Soft synthetic makeup brushes or paper tortillons help diffuse harsh graphite lines into seamless skin transitions.
2. Step 1: Anatomy Breakdown and Reference Selection
To draw something realistically, you must first understand what lies beneath the surface. An eye is not a flat shape pasted onto a face; it is a sphere sitting inside a bony socket.
Analyzing the Major Structures
- The Sclera: The white of the eye, which is rarely ever pure white due to shadows and spherical volume.
- The Iris and Pupil: The colored ring and central aperture that control light intake and provide the focal point of emotion.
- The Eyelids and Folds: Thick muscular folds that wrap around the eyeball, casting soft drop-shadows onto the sclera.
- The Lacrimal Caruncle (Tear Duct): The pinkish, wet corner node that grounds the eye in a realistic anatomical setting.
3. Step 2: Laying Down the Core Construction Lines
Avoid the classic beginner mistake of drawing a symmetrical almond shape straight away.
Mapping Proportion and Placement
- Start with a soft light circle or a slanted oval layout to define the outer boundaries.
- Lightly sketch the angle of tilt. Real human eyes rarely sit completely horizontal; subtle tilts add dynamic character and expression.
- Mark where your light source originates. If your light comes from the upper left, every shadow, highlight, and reflection must follow that consistent trajectory.
4. Step 3: Mastering the Iris and Pupil (The Heart of Realism)
The iris gives an eye its soul, depth, and color intensity. Rushing this step will instantly flatten your drawing.
Creating Depth and Organic Texture
- Locking in the Pupil: Use your darkest 8B pencil to render the pupil, leaving a clean, unshaded gap for the primary light reflection (catchlight).
- Drawing Radiating Fibers: Instead of shading the iris flatly, use light, sweeping strokes that radiate outward from the pupil like spokes on a wheel.
- Layering Mid-tones: Darken the outer perimeter of the iris to create a natural limbal ring—this stark contrast instantly pops the eye forward and creates a glowing illusion.
5. Step 4: Shading the Eyeball and Waterlines
One of the biggest giveaways of an amateur drawing is a stark, blinding-white sclera.
Debunking the “Pure White” Myth
- Because the upper eyelid casts a natural shadow downward, the top portion of the eyeball (sclera) must always be shaded darker than the bottom.
- Render the wet waterlines of the lower and upper lids carefully. A thin line of highlights along the rim gives the eye that wet, glistening, alive appearance.
- Detail the inner corner tear duct using subtle pink and grey tones, blending smooth gradients to mimic moist tissue.
6. Step 5: Eyelids, Skin Texture, and Eyebrows
Surrounding skin elements ground the eyeball into a realistic face rather than looking like an isolated marble.
Building Skin Realism and Brows
- Build value gradients along the upper eyelid crease, deepening the shadow where skin folds over itself.
- Use a kneaded eraser to dab tiny, random dots for pores, and add soft hatching under the lower lid to suggest fine expression lines.
- Render eyebrows using long, sweeping directional strokes. Never draw individual hairs stiffly straight; they naturally cross over each other and grow outward and upward.
7. Step 6: Rendering Realistic Eyelashes
Lashes are often overdone, turning into heavy, spiky spider legs that ruin an otherwise great drawing.
The Golden Rules of Natural Lashes
- Varying Length and Thickness: Real eyelashes grow in clusters, overlap, curve in different directions, and vary in thickness.
- The Root Connection: Ensure every single lash originates firmly from the eyelid margin or follicle line, tapering smoothly to a razor-sharp point at the tip.
- Upper vs. Lower Lashes: Upper lashes are thick, dense, and sweep heavily upward and outward. Lower lashes are sparse, much shorter, and point delicately downward.
8. Final Polish and Next Steps
Once your values are balanced, take a step back and squint at your drawing. Do the highlights stand out cleanly? Is the transition from dark to light smooth and believable? Use a white gel pen or a precision electric eraser to pop your final specular highlights in the eyes.
Mastering realistic eyes takes patience, but with these step-by-step techniques, your portraits will instantly transform from ordinary sketches to lifelike works of art. Grab your pencils and start sketching your masterpiece today!