Introduction
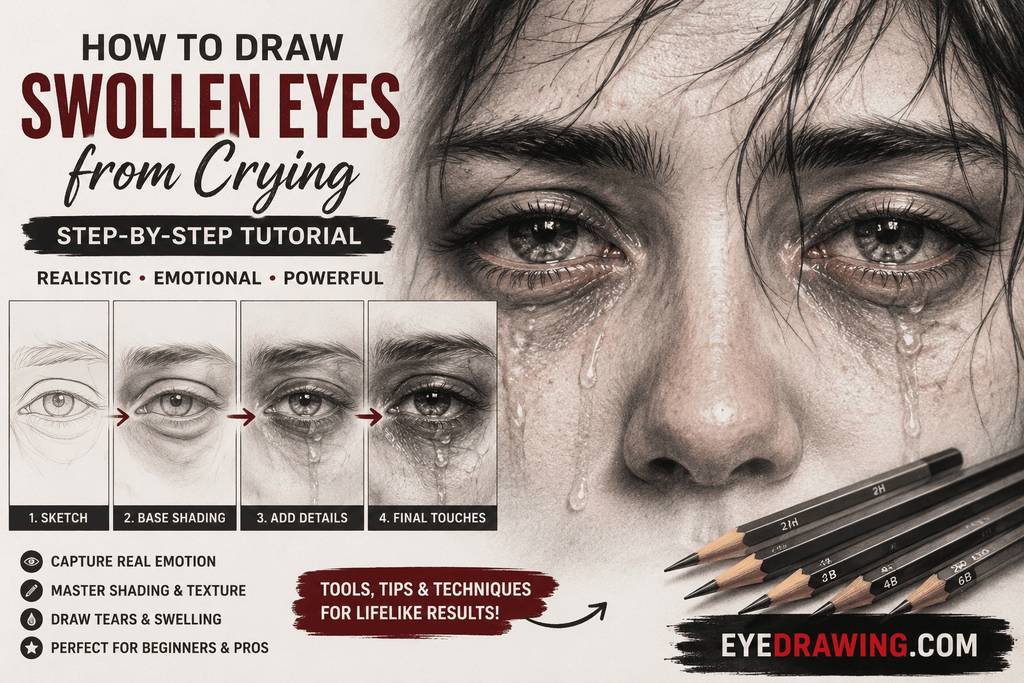
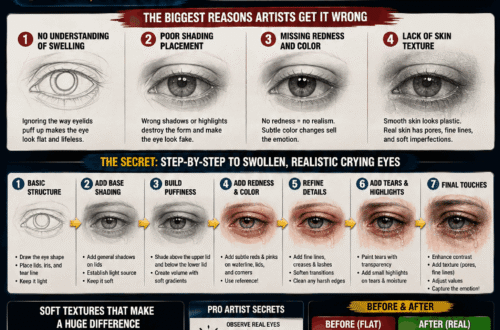
Portraits are windows to the human soul, but capturing true emotion requires more than just drawing symmetrical shapes. When we look at a portrait of someone who has been crying, our brains immediately search for authenticity. A flat, clean-lined eye will never convey the heavy, raw weight of grief, stress, or profound relief. To master emotional realism, an artist must learn how to render physical distress—specifically, how to draw swollen eyes from crying.
When a person cries, the delicate tissue around the ocular orbit retains fluid, creating heavy, puffy eyelids, softened creases, and a reddened, glossy waterline. Capturing these subtle structural distortions transforms a standard drawing into a striking narrative piece. In this comprehensive, step-by-step tutorial, you will learn the exact techniques, graphite grades, and shading strategies required to sketch lifelike, tear-filled, swollen eyes that evoke genuine feeling.
Understanding the Anatomy of Crying Eyes
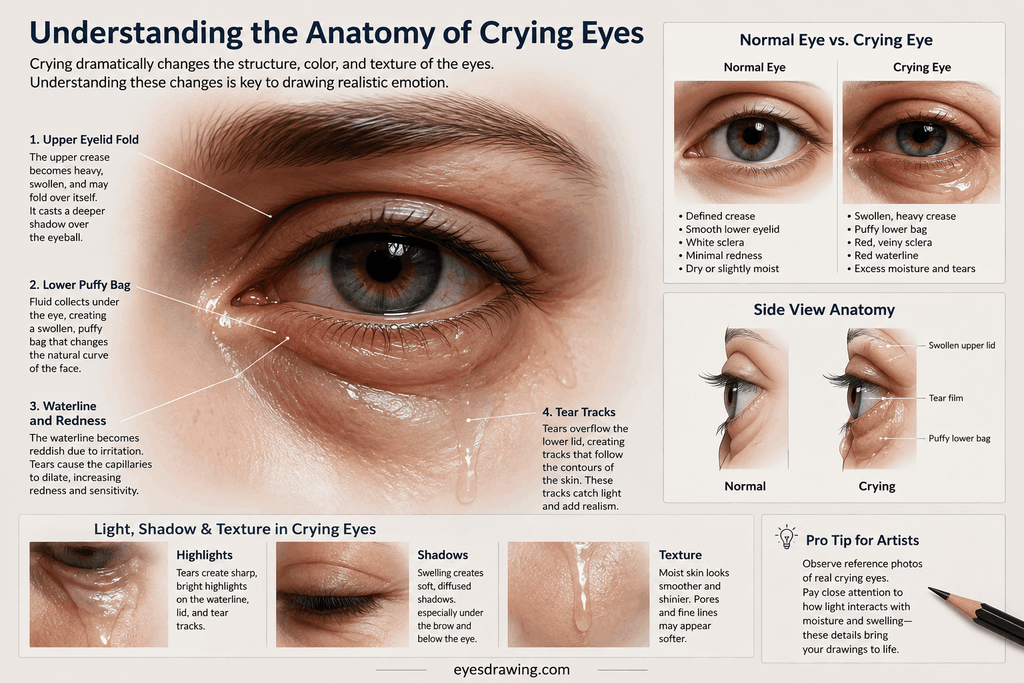
Before laying your pencil to paper, you must understand how weeping changes facial anatomy. The skin around the eyes is the thinnest on the human body, making it exceptionally prone to swelling and fluid retention (edema) caused by salt buildup and emotional stress.
- The Upper Eyelid Fold: Normally crisp and defined, the upper crease becomes heavy, bulging downward and partially shadowing the eyeball. The skin may look slightly stretched or creased multiple times.
- The Lower Puffy Bag: Fluid pools directly beneath the lower eyelashes, creating a distinct mound or “bag” that alters the natural curve of the cheekbone connection.
- The Waterline and Redness: Capillaries dilate due to irritation, making the inner rims of the eyelids look pink or reddish. The eye surface becomes hyper-lubricated, creating distinct tracks of moisture.
- Light Play: Moisture and swelling introduce unique highlights and deep, soft-edged shadows that differ drastically from a normal, dry eye.
Essential Tools and Materials
To achieve smooth gradients and striking contrast, gather these professional drawing supplies:
- Graphite Pencils: 2H (for light guidelines), HB (for midtones), 2B and 4B (for deep shadows and pupils).
- Blending Tools: A soft makeup brush or blending stump (tortillon) for smooth skin texture.
- Erasers: A precision kneaded eraser to lift out highlights and shape watery glints.
- Paper: Smooth or medium-tooth drawing paper (100gsm or higher) to prevent smudging grit into your highlights.
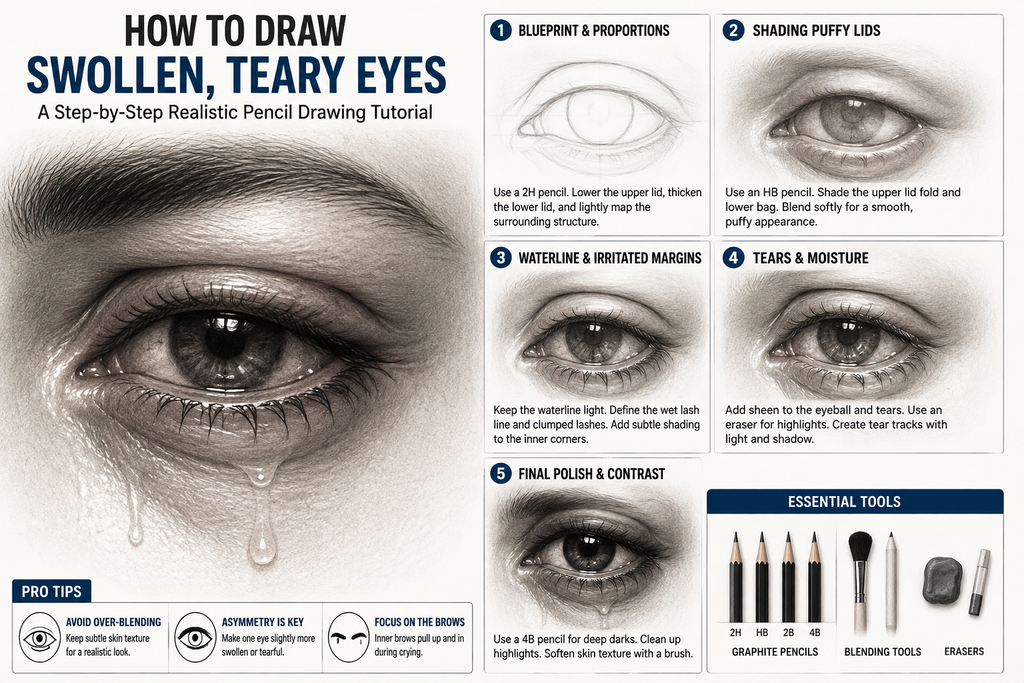
Step-by-Step Tutorial: How to Sketch Swollen, Teary Eyes
Step 1: The Blueprint and Proportions
Begin with your 2H pencil using very light, feather-light strokes. Draw a standard almond-like eye shape, but slightly distort the proportions to signal distress.
- Lower the upper eyelid curve so it sags slightly over the iris.
- Expand the thickness of the lower lid line to mimic fluid buildup beneath the lash line.
- Lightly sketch the orbital bone structure, keeping in mind that the surrounding flesh looks heavier and more compressed than usual.
Step 2: Shading the Puffy Lids and Creases
Puffy skin has soft, diffused edges rather than sharp, hard lines.
- Take your HB pencil and gently shade the upper eyelid fold, pressing slightly harder directly in the crease where shadow deepens.
- Use a blending stump or brush to smooth the graphite outward toward the eyebrow, creating a soft, pillow-like contour on the upper lid.
- Shade the lower bag, ensuring the transition into the cheek is gradual. The heaviest shadow should sit right under the puffy lower fold to give it dimension and weight.
Step 3: Rendering the Waterline and Irritated Margins
Crying causes the inner rims of the eyes to become moist and inflamed.
- Leave the absolute edge of the lower waterline completely white or very lightly tinted.
- Use a sharp HB pencil to suggest the thickness of the wet lash line, rendering individual lower lashes clumping together due to tears. Clumped eyelashes are a dead giveaway of recent weeping and add immense realism.
- Lightly indicate pinkness or irritation by blending a soft gray-tone around the inner corners of the eye (the lacrimal caruncle).
Step 4: Drawing Realistic Tears and Moisture
Tears catch light like tiny lenses. Getting them right is what brings the drawing to life.
- The Eyeball Sheen: Instead of making the white of the eye (sclera) completely clean, add a subtle, uniform gray gradient across the eyeball, leaving bright, sharp white reflections where pooling moisture catches a light source.
- Tear Tracks: If drawing a tear rolling down the cheek, use your kneaded eraser to lift a clean, vertical streak out of your midtone shading.
- Outline the edges of the tear track with your 2B pencil to create a wet, refractive border. The side facing the light source will have a bright edge, while the opposite side will cast a tiny, dark shadow onto the skin.
Step 5: Final Polish and Contrast Boost
The secret to dramatic realism lies in dynamic range—the contrast between your deepest darks and brightest highlights.
- Take your 4B pencil to darken the pupil, the upper lash line, and the deepest pockets of the inner eye corners.
- Check your highlights: use a mechanical eraser or a sharp kneaded eraser to clean up any stray graphite sitting inside your tear drops or eyeball catchlights.
- Soften harsh pencil strokes using a clean blending brush to ensure the skin texture looks smooth, puffy, and human.
Pro Tips for Lifelike Emotion
- Avoid Over-Blending: While puffy skin is soft, losing all texture can make the drawing look like plastic. Keep subtle grain in the skin tones.
- Asymmetry is Key: Human faces are never perfectly symmetrical when crying. Make one eye slightly more swollen or the tear track on one side heavier to enhance the authentic narrative.
- Focus on the Eyebrows: The inner corners of the eyebrows typically pull upward and inward during crying, creating vertical tension lines above the bridge of the nose. Integrating this detail completes the emotional illusion.
Conclusion
Drawing swollen, teary eyes is a fantastic exercise in mastering soft shading, light refraction, and anatomical texture. By stepping away from rigid perfection and embracing the organic, fluid shapes of human emotion, you can create portraits that truly resonate with viewers. Take your time with the layers, build your contrasts gradually, and let your pencil tell a powerful visual story.
What specific drawing medium (graphite, charcoal, or digital) do you plan to use for this artwork on your blog?