Introduction: The Power and Precision of Small Eyes in Art
When people think of drawing eyes, they often picture massive, expressive anime characters or intricately detailed hyper-realistic portraits that capture every reflection in the iris. However, mastering the subtle art of the beady-eyes-drawing opens up a completely unique dynamic in illustration. Whether you are sketching a cunning animal character, an intense vintage portrait, a stylized comic figure, or capturing a specific piercing gaze, small and sharp eyes carry an immense amount of emotional weight.
In the world of illustration, the term “beady” often brings to mind small, dark, and bead-like eyes that look intensely focused or mischievous. Mastering this style requires an understanding of contrast, negative space, and minimal linework. Because you have less canvas area to work with inside a small eye structure, every single pencil stroke, highlight, and shadow matters immensely. If you misplace a highlight by even a millimeter, the expression can shift entirely from focused to vacant.
Throughout this comprehensive guide, we will break down the essential steps, structural guidelines, and professional shading techniques needed to elevate your artwork. By the end of this tutorial, you will have the confidence to integrate striking, well-defined small eyes into any drawing project with absolute precision.
Phase 1: Understanding the Anatomy Behind Beady Eyes
Before putting pencil to paper, it is crucial to analyze what actually defines a small or beady eye structure. Unlike large, wide-open eyes, beady eyes are characterized by tight periorbital structures, narrowed eyelids, and a strong emphasis on a dark, gleaming center.
1. Proportions and Placement
When designing a character or subject with smaller eyes, placement dictates the mood:
- Higher Placement: Positioning small eyes higher up on the skull often gives a cunning, sly, or calculating expression.
- Closer Together: Placing the eyes closer to the bridge of the nose creates an intense, focused, or suspicious look.
- Deep-Set Shadows: Because these eyes are typically smaller, they often sit deeper beneath the brow bone, requiring careful management of cast shadows.
2. The Importance of Minimalist Detail
When working on a beady-eyes-drawing, less is often more. Overcomplicating the iris with too many secondary highlights or complex line work can muddy the design. Instead, rely on crisp outlines, deep blacks, and a single, well-placed point of light to create a glistening effect.
Phase 2: Essential Tools and Materials
To achieve clean lines and rich, dark tones essential for sharp eye illustrations, having the right setup is vital. Here is what you will need:
- Pencil Grades: Use an HB pencil for initial light guidelines, a 2B or 4B for mid-tones, and a 6B or 8B for deep, velvety blacks in the pupils.
- Drawing Paper: A smooth Bristol board or a fine-grain sketch pad ($100\text{ gsm}$ to $150\text{ gsm}$) prevents feathering and allows for precise blending.
- Eraser Tools: A kneaded eraser for lifting graphite gently, and a precision mechanical eraser (or pen eraser) to carve out sharp catchlights.
- Blending Stumps: Useful for smoothing out graphite around the eyelid folds, though keep your pencil strokes clean to maintain texture.
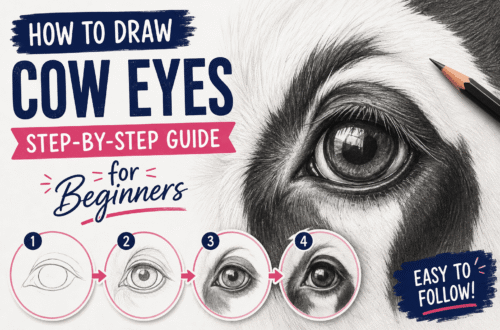
Phase 3: Step-by-Step Drawing Guide
Follow these sequential steps to construct your artwork from scratch, ensuring perfect symmetry and depth.
[Light Grid Setup] ---> [Basic Outlining] ---> [Shading & Depth] ---> [Highlighting & Polish]
Step 1: Establishing the Structural Guidelines
Begin with light, sweeping lines. Do not press down hard with your pencil; you want these initial guidelines to be easily erasable.
- Draw a horizontal center guideline across your page.
- Lightly sketch two small, almond or oval shapes representing the outer boundaries of the eyes. Keep them compact to maintain the “beady” aesthetic.
- Lightly map out the bridge of the nose between them to anchor the eyes in a realistic facial structure.
Step 2: Refining the Eyelids and Sclera
Once the basic shapes are secure, define the upper and lower eyelids.
- The upper eyelid should be drawn with a slightly thicker, bolder stroke to simulate the natural shadow cast by the eyelashes and brow.
- Keep the visible white portion of the eye (the sclera) minimal. In many sharp or beady eye styles, the iris and pupil dominate the entire socket space.
Step 3: Drawing the Iris and Deep Pupil
This is the focal point of your beady-eyes-drawing.
- Draw a dark circle perfectly centered or slightly offset within the eye socket depending on the direction your subject is looking.
- Fill the inner core (the pupil) with your softest, darkest pencil ($6\text{B}$ or $8\text{B}$).
- Leave a tiny, unshaded white speck untouched. This negative space acts as the primary catchlight, instantly bringing the drawing to life.
Step 4: Shading the Surrounding Skin and Folds
Depth makes flat drawings look three-dimensional.
- Shade the skin directly above the upper eyelid using an HB pencil, gently blending outward.
- Add a soft shadow in the inner corners of the eyes near the tear ducts to create a recessed, natural look.
- Smooth out harsh gradients using a blending tool, but ensure the edges of the eye remain crisp.
Phase 4: Advanced Shading and Texturing Techniques
To truly make your artwork stand out and capture high search visibility and audience engagement, you must go beyond basic outlines. Here are professional techniques to elevate your piece:
1. Contrast Maximization
The secret to a compelling beady eye is extreme contrast. By placing your deepest blacks right next to your brightest highlights, the eye pops off the page. Do not be afraid to press firmly with your dark pencil inside the pupil while keeping the surrounding skin soft and muted.
2. Simulating Wetness and Shine
Eyes naturally reflect light due to moisture. To enhance this effect:
- Use a kneaded eraser to dab away a secondary, softer reflection opposite your main catchlight.
- Ensure the boundary where the eyelid meets the eyeball has a subtle, clean white line to represent moisture buildup along the waterline.
Phase 5: Common Mistakes to Avoid
Even experienced artists occasionally fall into traps when working with small-scale features. Keep these pitfalls in mind:
- Overworking the Details: Trying to squeeze too many intricate lines into a small iris ruins the clean, piercing aesthetic of beady eyes. Keep strokes deliberate and sparse.
- Ignoring Symmetry: When drawing a pair of eyes, minor asymmetries are natural, but a drastic size or angle mismatch can make the character look unfocused or distorted. Use light measurement ticks before committing to dark lines.
- Flat Shading: Forgetting to shade the socket area makes the eyes look like stickers pasted onto a flat surface. Always ground the eyes with proper skin folds and brow shadows.
Conclusion: Practice and Perfection
Mastering a specialized style like beady-eyes-drawing is all about patience, control, and understanding how light interacts with minimalist facial features. By practicing these step-by-step techniques regularly, refining your use of contrast, and focusing on clean proportions, you will dramatically improve your overall illustration skill set.
Incorporate these methods into your next art project, experiment with different character expressions, and watch how these small, intense details transform your creative work. Keep sketching, stay patient with your progress, and continue exploring new dimensions in your artistic journey!