Emojis have become the universal language of the digital age. From expressing pure excitement to conveying total skepticism, a single glance from an emoji can say a thousand words. Among the vast library of digital expressions, eye-focused emojis hold a special place. Whether it is the classic wide-eyed stare, the playful winking face, or the mischievous side-glance, eyes communicate emotion faster than any other facial feature.
If you have ever wanted to bring these digital icons off your phone screen and onto a physical sketchbook or digital canvas, you are in the right place. In this comprehensive guide, we will dive deep into eyes emoji drawing, exploring everything from basic shapes to creative artistic variations that will level up your illustration skills.
Why Eyes Emoji Drawing is So Popular
Before grabbing your pencil, it helps to understand why sketching emoji eyes is such a rewarding exercise.
- Simplicity Meets Emotion: Emojis are designed to be universally understood at a glance. By breaking down complex human expressions into minimalist geometric shapes, artists can practice capturing emotion with very few lines.
- Beginner-Friendly: If you find drawing realistic human eyes intimidating, emoji art offers a welcoming entry point. You do not need years of anatomy training to draw a circle with a cute highlight.
- Versatility in Design: Once you master the basics, you can customize emoji eyes endlessly. You can turn them into stickers, custom merchandise, digital chat graphics, or fun doodles in your journal margins.
Essential Tools You Will Need
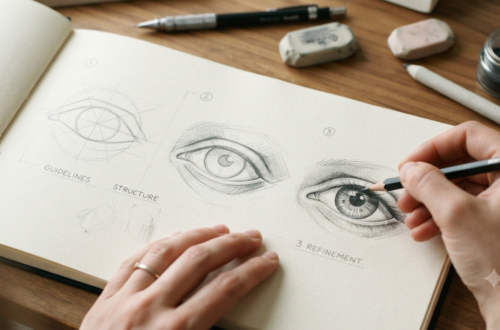
You do not need an expensive studio setup to start your eyes emoji drawing journey. Gather these basic supplies depending on your medium of choice:
- For Traditional Drawing:
- Smooth sketch paper or a mixed-media sketchbook.
- A standard HB pencil for sketching and a softer 2B or 4B pencil for shading.
- A precision kneaded eraser to clean up guidelines.
- Fine-line black ink pens (like Micron pens) for clean outlining.
- Colored pencils, markers, or watercolors to add that iconic bright yellow emoji hue.
- For Digital Drawing:
- A tablet (such as an iPad with Apple Pencil or a Samsung Galaxy Tab).
- Drawing software like Procreate, Adobe Fresco, or Clip Studio Paint.
- A digital canvas set to a square aspect ratio (e.g., 2048 x 2048 pixels) with a resolution of 300 DPI.
Step-by-Step Tutorial: The Classic Shifty Eyes Emoji
Let us start with one of the most expressive and fun icons to illustrate: the side-glancing eyes (often used to express suspicion, curiosity, or avoiding awkward situations).
Step 1: Establish the Base Circle
Every great emoji starts with a perfect circle.
- Lightly sketch a circle using your pencil. If you struggle with freehand circles, use a stencil, a roll of tape, or the shape tool if you are working digitally.
- Keep your lines very light so you can erase them later. This circle represents the boundary of the emoji face, which helps anchor where the eyes will sit.
Step 2: Map Out the Facial Guidelines
To ensure your eyes are balanced, draw a faint horizontal guideline across the vertical middle of the circle, and a vertical guideline down the center.
- The intersection helps you place features accurately.
- For a side-glancing expression, position your eye shapes slightly off-center toward one side of the horizontal axis.
Step 3: Draw the Eye Shapes
Unlike standard round cartoon eyes, the shifty eyes emoji features two distinct, rounded-oval shapes tilted slightly downward or looking toward the edge of the face.
- Draw two parallel, curved arches that resemble flattened semi-circles or bean shapes.
- Ensure both eyes point in the exact same direction (usually toward the left or right margin) to sell the suspicious look.
Step 4: Add the Pupils and Highlights
The magic of any emoji lies in its glossy, 3D finish.
- Inside each eye shape, draw a smaller solid dark oval or circle positioned squarely in the direction the eyes are looking.
- To create that signature glossy, wet-look sheen, leave one or two small white circular or oval spaces uncolored near the top edge of the pupil. These highlights make the emoji look alive and vibrant.
Step 5: Outline and Refine
Once you are happy with your pencil sketch, take your fine-liner pen and trace over your final lines with confidence.
- Let the ink dry completely for a minute to prevent smudging.
- Gently erase all underlying pencil marks using your eraser.
Step 6: Color and Shade
Fill the background face with a rich, vibrant golden yellow.
- If you are using markers, apply a smooth, even base layer.
- Add a soft orange or darker yellow shadow along the bottom curve and edges of the circle to give the flat digital icon a tactile, 3D spherical depth. Fill the eyes with a deep, glossy black, making sure your white highlights pop out cleanly.
Exploring Other Popular Eyes Emoji Variations
Once you have mastered the classic side-glance, try expanding your portfolio with these other popular expressions:
1. The Heart-Eyes Emoji
- The Concept: Pure adoration and love.
- How to Draw It: Instead of standard pupils, replace the eyes with two symmetrical cartoon hearts tilted slightly inward at the top. Add a soft pink blush underneath for extra cuteness.
2. The Star-Struck Emoji
- The Concept: Excitement, awe, and feeling star-struck by a celebrity or amazing news.
- How to Draw It: Draw two bold, multi-pointed cartoon stars in place of the eyes. Make one star slightly larger than the other to add dynamic movement and playfulness to the face.
3. The Winking Eye Emoji
- The Concept: Flirting, joking, or sharing a secret.
- How to Draw It: Keep one eye open as a cheerful curved arch pointing upward, and draw the winking eye as a sharp downward-curving arch with a little eyelash flare at the outer corner.
Pro Tips for Perfect Emoji Art
To make your artwork stand out and look professional, keep these expert tips in mind:
Pro Tip: Symmetry is crucial in digital design, but slight organic imperfections make hand-drawn art charming. Do not stress if your circles aren’t computer-perfect; hand-drawn character sketches have a warm, unique personality.
- Master Line Weight: Use thicker lines for the outer border of the emoji face and thinner lines for internal details like eyelashes or mouth creases. This creates visual hierarchy.
- Embrace Bold Colors: Emojis are meant to catch the eye instantly. Do not shy away from saturated primary colors and high-contrast highlights.
- Practice Proportions: Keep a reference sheet of official emoji styles nearby when you are starting out. Notice how placement changes the entire mood of the character.
Frequently Asked Questions
Is eyes emoji drawing difficult for absolute beginners?
Not at all! Because emojis are built from simple geometric shapes like circles, ovals, and arcs, they are among the easiest and most rewarding subjects for beginner artists.
What is the best software for digital emoji drawing?
Procreate (for iOS users) and Adobe Illustrator or Photoshop (for desktop users) are industry favorites. For free alternatives, Krita and MediBang Paint offer fantastic tools for illustrators.
How do I make my drawings look glossy?
The secret to achieving that shiny, digital glass look is high-contrast lighting. Always include crisp white highlight shapes offset against deep black pupils and vibrant base colors.
Conclusion
Embarking on an eyes emoji drawing project is a fantastic way to sharpen your sketching skills, play with digital aesthetics, and have fun with character expression. Whether you are creating custom stickers for your messaging apps, designing unique merch, or simply filling your sketchbook with playful doodles, practicing these iconic expressions opens the door to endless creative possibilities. Grab your pencil, pick your favorite emotion, and start bringing your digital world to life on paper today!