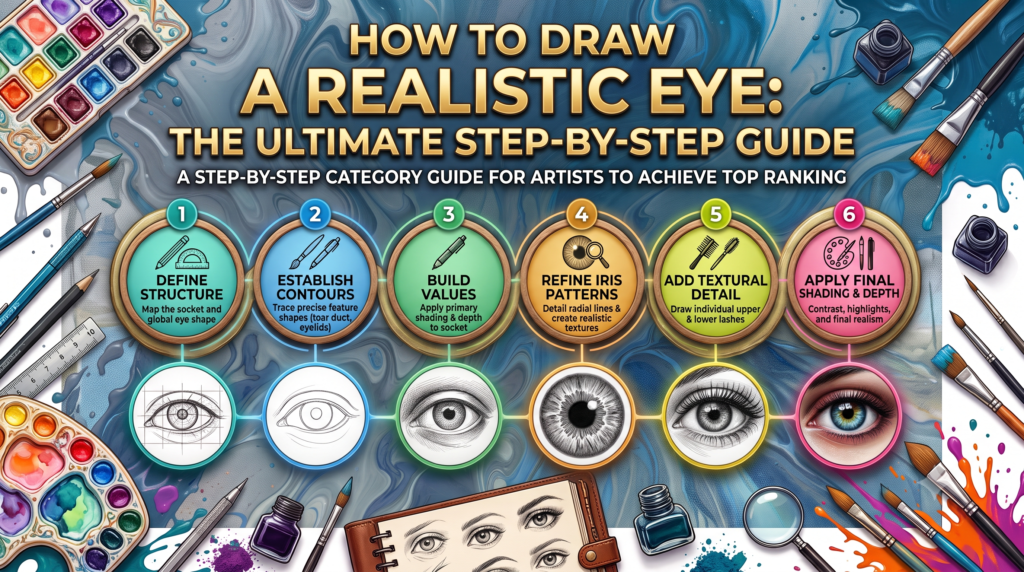
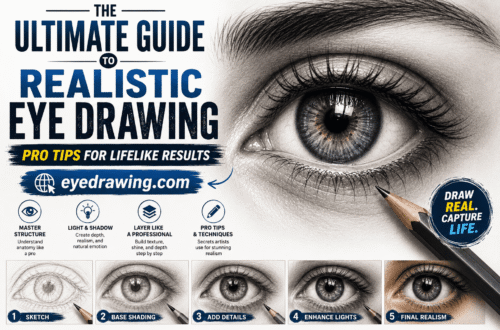
The human eye is often called the window to the soul, and for portrait artists, it is the ultimate focal point. Capturing a truly realistic eye drawing can feel incredibly daunting. You might find that your drawings look flat, the iris lacks depth, or the eyelashes resemble rigid sticks rather than soft, natural hairs.
Getting realism right isn’t about magical talent—it is about understanding geometry, mapping light, and mastering subtle value transitions. Whether you are a beginner looking to pick up a pencil for the first time or an intermediate artist striving for a hyper-realistic finish, this comprehensive guide will break down the exact mechanics behind drawing a lifelike eye.
1. Setting the Foundation: The Anatomy of a Realistic Sketch
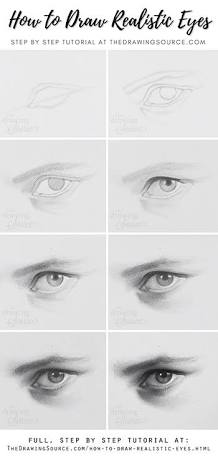
Before you begin shading, your basic proportions must be structurally accurate. A common mistake is drawing the eye as a perfect almond shape. In reality, the human eye is a three-dimensional sphere nestled inside a bony socket, covered by wraps of skin (the eyelids).
To begin, map out the fundamental shapes using a hard graphite pencil (like an H or HB). Keep your pressure incredibly light so these guide marks can be easily erased or blended out later.
The Key Outlines to Focus On:
- The Outer Outline: Notice that the upper eyelid curve is usually steeper near the inner corner (tear duct), while the lower lid has a subtler, more relaxed curve.
- The Eyelid Thickness: Eyelids have physical depth. Always draw a thin, secondary parallel line along the lower rim to represent the wet shelf where water sits. Failing to include this is the number one reason eye drawings look flat.
- The Iris and Pupil Circle: The iris is a perfect circle, but unless a person is wide-eyed with shock, the upper lid will cover the top portion of it. Ensure your pupil is exactly centered inside the iris.
2. Capturing Depth: Shading the Iris and Pupil
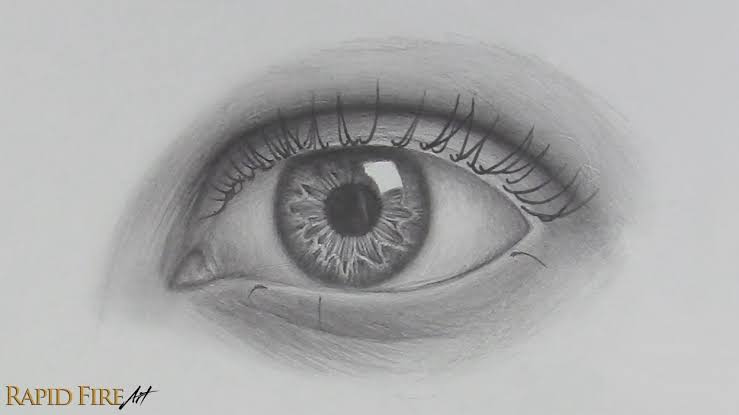
Once your linework is locked in, it is time to build depth. The iris functions like a concave bowl, meaning it interacts with light in a highly specific way. A realistic iris should never be shaded with one uniform color or value.
First, identify your primary light source. Mark out your highlights early and leave them completely white (the bare paper). Next, take a dark, soft pencil (4B or 6B) and fill in the pupil completely. The pupil should be the darkest value in your entire drawing.
Step-by-Step Iris Shading:
- The Dark Border: Darken the outer ring of the iris (the limbal ring). This gives the eye structure and contrast.
- Creating Spoke-like Radiations: Draw lines radiating outward from the pupil toward the edge of the iris, almost like the spokes of a bicycle wheel. Mix crypts (dark folds) and furrows (lighter lines) to create the organic, fibrous texture of the eye.
- The Shadow under the Eyelid: The upper eyelid casts a soft shadow downward onto the top part of the iris and the whites of the eye (the sclera). Shade this area darker to ground the eyeball inside the socket.
- Opposite Light Reflection: Because the iris is curved, light entering from the top hits the opposite bottom slope. This means the bottom half of the iris often appears brighter and more vibrant than the top.
3. Rendering Realistic Eyelashes and Skin Texture
With the iris complete, you can focus on the surrounding elements. The “whites” of the eye are never purely white; use a blending stump (tortillon) or a soft 2H pencil to gently shade the corners of the eyeball, making it look round instead of flat.
Next comes the step that frustrates many artists: the eyelashes. The secret to drawing realistic eyelashes is all in the stroke pressure and direction. Eyelashes do not grow in straight, parallel lines. They grow in clusters, cross over each other, and curve outward from the outer edge of the eyelid shelf we drew earlier.
Pro-Tips for Lifelike Textures:
- The Eyelash Root-to-Tip Flick: Place your pencil down with heavy pressure at the eyelid rim, and flick quickly upward or downward, releasing pressure so the tip naturally tapers off into a fine point.
- The Lower Lashes: Lower lashes are significantly shorter, thinner, and more sparse than upper lashes. Draw them in small, irregular V-shapes or groupings.
- Micro Skin Textures: To elevate your sketch to a hyper-realistic standard, don’t leave the surrounding skin completely smooth. Use a kneaded eraser pinched into a sharp point to tap out tiny pores, and use a sharp pencil to add subtle wrinkles along the eyelid crease and under-eye area.
Summary Checklist for Realism
To ensure your next sketch stands out, double-check your process against this quick reference workflow:
| Feature | Key Focus Area | What to Avoid |
| Eyelids | Include the lower wet rim thickness | Drawing a single flat line |
| Pupil | Make it pitch black (highest contrast) | Leaving it faded or grey |
| Sclera (Whites) | Curve the edges with soft shadows | Leaving it solid white |
| Lashes | Flick from root to tip in irregular clusters | Drawing stiff, parallel lines |
By mastering these steps, your sketches will shift from flat geometric icons into vibrant, expressive works of art. Grab your pencils, print out a high-quality reference photo, and begin practicing these techniques today!