They say the eyes are the windows to the soul. In portrait artistry, they are also the absolute focal point. A perfectly captured eye can make a drawing leap off the page with emotion and life, while a poorly executed one can leave your portrait looking flat, lifeless, or uncanny.
If you have ever tried a realistic eye sketch only to find it looking more like a flat cartoon football than a living human eye, you are not alone. Drawing realistic eyes requires looking past what your brain thinks an eye looks like and studying the structural forms, shadows, and textures that exist in reality.
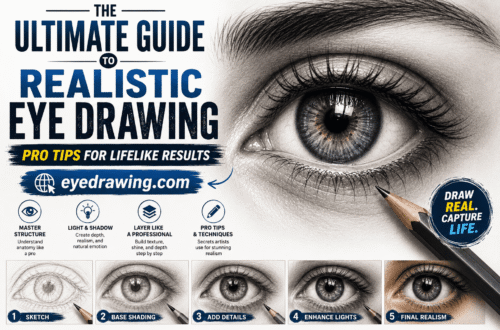
This comprehensive guide breaks down how to create a breathtakingly realistic eye sketch from scratch. Whether you are a beginner picking up graphite for the first time or an intermediate artist looking to sharpen your shading techniques, this step-by-step tutorial will elevate your portrait game.
1. The Essential Tools for Realistic Sketching
Before making your first mark, you need the right tools. While you can draw with a standard school pencil, professional sketching tools allow you to achieve the deep contrasts and smooth gradients required for hyper-realism.
- Graphite Pencils (Range of Grades): You will want a variety of hard and soft leads. A 2B or HB pencil is perfect for light initial guidelines. Medium soft pencils like 4B and 6B are crucial for mid-tones and dark shadows, while a ultra-soft 8B or 9B pencil is necessary to hit those rich, bottomless blacks in the pupil.
- Blending Tools: A paper tortillon (blending stump) or a soft tissue paper wrapped around your finger allows you to blend graphite smoothly, creating the illusion of soft skin textures.
- Erasers: A standard plastic eraser handles bulk cleaning, but a kneaded eraser is your secret weapon. You can mold it into sharp points to tap away graphite and pull out crisp highlights. A mechanical mono-zero eraser is also excellent for fine details like individual skin wrinkles or hair reflections.
- High-Quality Drawing Paper: Opt for medium-to-heavyweight drawing paper with a smooth finish (such as Bristol or hot-press paper) if you want clean gradients, or a slight tooth if you enjoy a textured graphite look.
2. Understanding the Basic Anatomy of the Eye
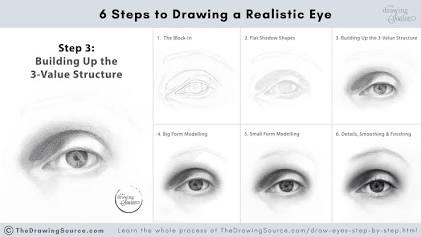
The biggest mistake beginners make is drawing the eye as a flat 2D shape. To capture realism, you must think in three dimensions. The human eye is not a flat almond; it is a sphere (the eyeball) nestled inside a skeletal socket, covered by two thin folds of skin (the eyelids).
When sketching, keep these core anatomical components in mind:
- The Sclera: Commonly known as the “white of the eye.” It is a sphere, meaning it curves back into the head and requires subtle shading around the edges.
- The Iris and Pupil: The iris is a circular, fibrous muscle, and the pupil is the black aperture at its center. Because the cornea covering them is a clear dome, the iris handles light uniquely, often featuring complex reflections.
- The Tear Duct (Caruncle): Located at the inner corner of the eye, this small pink mass of tissue breaks up the sharp meeting point of the upper and lower lids.
- The Eyelid Thickness: Eyelids have a distinct thickness. The lower lid shelf, in particular, catches light and separates the eyeball from the lower lashes.
3. Step-by-Step Guide to Your Realistic Eye Sketch
Let’s walk through the physical drawing process from initial layout to final high-contrast highlights.
Step 1: The Initial Block-In (The Line Art)
Using an HB or 2B pencil, apply very light pressure to sketch the basic geometry. Avoid drawing heavy, dark lines at this stage, as they are difficult to erase and will ruin the realism later.
- Sketch a soft circle to represent the overall eyeball.
- Map the tilt and curve of the upper and lower eyelids over that circle.
- Mark the iris as a perfect circle. Keep in mind that unless a person is wide-eyed with surprise or fear, the upper eyelid usually cuts off the top portion of the iris slightly.
- Define the crease of the upper eyelid, noting how it mirrors the curve of the eyeball underneath.
Step 2: Establish the Pupil and the Highlights
The pupil determines where your subject is looking. Find the absolute center of your iris and sketch the pupil.
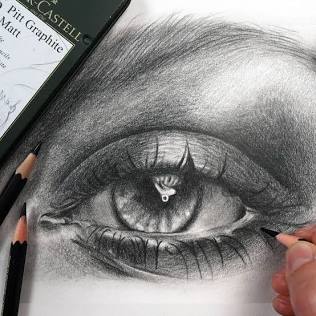
Before you shade anything, map out your highlights. Look at your reference photo to see where light sources reflect on the wet surface of the cornea. Draw the exact shapes of these window or soft-box shapes directly across the iris and pupil.
Crucial Tip: Leave these highlight shapes completely white. Do not color or shade inside them; they are the brightest spots of your drawing and give the eye its wet, realistic sheen.
Step 3: Shading the Iris
The iris is packed with radial patterns—fibers running from the outer rim inward toward the pupil.
- Fill the pupil in with your darkest pencil (6B or 8B), keeping the edges sharp, while leaving your highlight areas clean.
- Darken the outer rim of the iris (the limbal ring).
- Using a medium pencil (4B), draw soft lines radiating outward from the pupil and inward from the limbal ring.
- Leave a slightly brighter area in the bottom half of the iris opposite your main light source. Because the cornea is a lens, light enters from the top and illuminates the lower curve of the iris structure.
4. Master the Art of Soft Shading & Contrasts
Once the core of the eye is complete, your sketch needs three-dimensional depth. This is achieved by creating smooth gradients on and around the eyeball.
Shading the Sclera (The White of the Eye)
One of the fastest ways to break realism is to leave the sclera completely white. The eyeball is a sphere; therefore, it casts a shadow.
- Take a blending stump with a bit of leftover graphite on it (or a very soft HB pencil) and lightly shade the outer corners of the sclera.
- Add a soft cast shadow directly beneath the upper eyelid. This single shadow instantly grounds the eyeball underneath the skin, making it look set back and real.
Mapping Skin Contours
The skin around the eyes handles a massive amount of form transition.
- Blend graphite into the socket area above the upper eyelid crease to create the depth of the brow bone.
- Apply soft, sweeping values below the lower lid to indicate the tear trough and cheek curvature.
- Use your blending stump to ensure there are no harsh lines on the skin—only soft transitions of value.
5. Adding the Finishing Details: Lashes and Texture
The final 10% of your drawing is where the magic happens. This is where you transition a good drawing into a hyper-realistic eye sketch.
How to Draw Realistic Eyelashes
Many beginners draw eyelashes like straight spikes sticking out of the eye. In reality, eyelashes curve smoothly, clump together, and root into the outer edge of the eyelid shelf.
- The Root Curve: Lashes start by pointing downward slightly before curling sharply upward.
- The Thickness Principle: Eyelashes are thicker at the root and taper to a microscopic point at the tip. Flick your pencil from the root upward to naturally create this tapered finish.
- Clumping and Variety: Eyelashes do not grow in perfect, evenly spaced lines. They cross over one another, grow in clusters of two or three, and vary wildly in length.
- The Lower Lashes: Keep lower eyelashes significantly shorter, thinner, and more spaced out than the top ones. Ensure they grow from the outer border of the lower eyelid shelf, leaving the wet waterline clear.
Incorrect (Spiky & Rigid):   ||||||||||
Correct (Curved & Clumped):   \ \/ / (/) /
Skin Details and Tears
Use a sharp mechanical eraser or a fine-tipped gel pen to pick out small details:
- Add tiny, irregular white reflections along the lower wet waterline.
- Lightly tap a kneaded eraser over shaded skin areas to create subtle skin pores and fine laugh lines.
6. Common Pitfalls to Avoid
| Mistake | Why It Breaks Realism | How to Fix It |
| Flat Sclera | Makes the eye look flat and cartoonish. | Add soft shadows to the outer corners and under the top lid. |
| Perfectly Uniform Lashes | Looks robotic or synthetic. | Flick your pencil quickly, vary lengths, and let them cross over. |
| Ignoring Lid Thickness | Makes the eye look glued onto the face. | Always leave a visible shelf on the lower eyelid rim. |
| Fearing Deep Blacks | Results in a washed-out, grey drawing. | Use a 6B to 8B pencil to make the pupil intensely dark. |
Summary for Aspiring Artists
Learning to draw a realistic eye sketch comes down to careful observation and patience. By treating the eye as a three-dimensional landscape of light and shadow rather than a simple shape, you can achieve beautiful depth and realism.
Practice drawing single components—focusing strictly on the iris texture one day, and master eyelash curves the next. With consistent practice and the right value choices, your sketches will soon hold the depth and sparkle of living eyes.