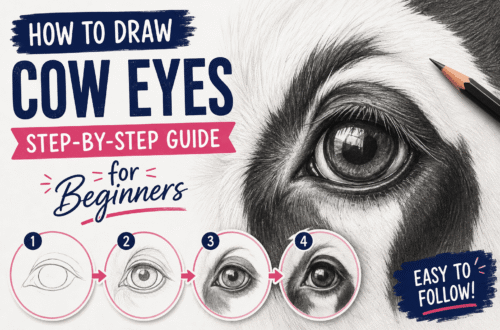
Art has always been one of the most powerful mediums for human expression, preservation, and healing. Among all the subjects an artist can choose to render, capturing the human face—and particularly the eyes—is perhaps the most profound. While drawing living eyes allows an artist to capture dynamic light, shifting expressions, and the vibrant spark of life, drawing deceased eyes represents a distinct, deeply emotional discipline.
Whether created as a memorial tribute, a commemorative piece, or a poignant exploration of grief and remembrance, rendering the eyes of someone who has passed away requires a unique blend of technical skill, sensitivity, and psychological insight. This comprehensive guide explores everything you need to know about deceased eyes drawing, from the emotional preparation to the advanced techniques required to translate a flat photograph into a striking, lifelike, and respectful work of art.
1. Understanding the Significance of Deceased Eyes Drawing
When a loved one passes away, photographs become our most precious treasures. However, photographs are static, two-dimensional captures of a single moment in time. A hand-drawn portrait, particularly one focused on the eyes, transcends the limitations of a photograph.
Why the Eyes Hold the Key to Memory
The eyes are universally recognized as the “windows to the soul.” They hold an individual’s history, their characteristic warmth, their unique gaze, and the subtle nuances of their personality. When viewers look at a memorial portrait, their gaze immediately gravitates toward the eyes. If the eyes are drawn correctly, they evoke an immediate sense of presence, comfort, and emotional resonance. If they are rendered poorly or mechanically, the entire portrait can feel flat, lifeless, or unsettling.
The Role of Art in Healing and Grief
For artists creating memorial art—whether for themselves, a grieving family member, or a client—the process is often therapeutic. Drawing requires intense focus, quiet contemplation, and deep observation. As the artist painstakingly shades the irises, contours the eyelids, and highlights the catchlights, they spend hours intimately connecting with the likeness of the person. This meditative process can aid in processing grief, honoring a legacy, and providing tangible closure or comfort to those left behind.
2. Essential Preparation and Reference Gathering
Before putting pencil to paper, proper preparation is vital. Unlike drawing from life, drawing someone who is deceased almost always relies on secondary reference materials, usually photographs taken during their lifetime.
Sourcing and Evaluating Reference Photos
- Quality Matters: Request or gather the highest-resolution photographs available. Look for close-up shots where the eyes are in sharp focus. Blurry or pixelated images make it difficult to discern critical details like the pattern of the iris, the texture of the eyelashes, and the precise shape of the tear ducts.
- Lighting and Contrast: Avoid using overexposed photos (where highlights wash out the eye details) or heavily shadowed photos (where the eyes are plunged into darkness). Ideal reference photos feature natural, directional lighting that clearly defines the brow bone, eyelid creases, and eyeball curvature.
- Capturing the “Living” Likeness: When drawing from reference photos of someone who has passed, it is crucial to select images that capture their genuine spirit—a relaxed smile line around the eyes, a characteristic crinkle, or a warm, direct gaze. Avoid using ID photos or hurried snapshots if possible, as these often capture forced expressions or artificial lighting.
Gathering Your Tools
To achieve professional, gallery-quality results in pencil or charcoal, ensure your toolkit is well-stocked:
- Graphite Pencils: A wide range of grades from 4H (for light, precise initial sketches) to 6B or 8B (for deep, velvety blacks and shadows).
- Charcoal (Optional): Compressed and vine charcoal can provide exceptionally dark values that graphite cannot always match, adding dramatic depth.
- Blending Tools: Tortillions (paper blending stumps) and soft makeup brushes or cotton swabs for smooth transitions. (Tip: Never use your bare fingers to blend, as skin oils can ruin the paper tooth and leave permanent smudges).
- Erasers: A kneaded eraser (for lifting pigment and creating soft highlights) and a precision mechanical eraser or battery-operated eraser (for sharp, clean catchlights and stray highlights).
- Paper: Heavyweight, fine-grain drawing paper (such as Bristol smooth/vellum or Strathmore drawing paper, 100+ GSM) that can handle multiple layers of shading and erasing without warping or tearing.
3. Anatomy of the Human Eye (The Foundation of Realism)
To draw realistic eyes—especially when working from potentially imperfect reference photos—an artist must understand the underlying anatomy. An eye is not a flat shape on a flat surface; it is a spherical sphere set inside a bony socket, surrounded by complex muscle and fat structures.
[ Bony Orbit / Eye Socket ]
       │
       ├──> Upper Eyelid (Casts shadow over the eyeball)
       ├──> Eyeball (Spherical form with wet, reflective surface)
       │      ├──> Iris (Colored ring with radial texture)
       │      └──> Pupil (Deepest black center)
       │      └──> Sclera (Off-white, curved background with subtle veins)
       └──> Lower Eyelid (Supports the sphere and catches uplight)
1. The Spherical Form of the Eyeball
Beginners often make the mistake of drawing the eye as an almond-shaped outline on a flat plane. In reality, the eyeball is a sphere. The eyelids wrap around this sphere like fabric draped over a ball. Recognizing this three-dimensional volume dictates where shadows and highlights fall.
2. The Sclera (The Whites of the Eyes)
The sclera is never pure white. Because the eyeball is spherical and recessed under the brow bone, the upper portion of the sclera is almost always shaded darker by the shadow cast by the upper eyelid. Additionally, the sclera features faint, branching blood vessels and subtle grey or pink gradients toward the corners (canthi) to indicate moisture and flesh.
3. The Iris and Pupil
- The Pupil: Located dead center (unless looking to the side), the pupil must be rendered as the darkest value in the drawing. However, leave a tiny crisp white margin if there is a bright light source reflecting.
- The Iris: The iris features intricate, sunburst-like radial fibers (trabeculae) extending from the pupil outward to the darker outer ring known as the limbal ring. Capturing these delicate patterns gives the eye its lifelike depth.
4. Eyelids and Eyelashes
- Thickness of the Eyelid: The eyelid has physical thickness and a defined rim. This rim catches light, creating a bright edge along the lower boundary of the upper lid.
- Eyelash Growth: Eyelashes do not grow in a neat, uniform row straight out of the skin line. They grow in irregular clumps, overlap, curve upward on the top lid (and downward on the bottom lid), and cast subtle shadows onto the white of the eye and the surrounding skin.
4. Step-by-Step Drawing Process for Deceased Eyes
Rendering a memorial eye drawing requires patience, reverence, and a methodical workflow. Rushing through the layers will result in a muddy, unnatural appearance.
Step 1: Light Construction and Proportion
- Using an H or 2H pencil, lightly sketch the overall proportions. Map out the distance between the eyes (typically one eye-width apart), the tilt of the axis, and the boundaries of the brow bone and tear ducts.
- Double-check your measurements against the reference photo. In memorial drawings, capturing the exact shape and slant of the eye is critical for instant recognition.
Step 2: Establishing Values and Deep Shadows
- Identify the primary light source from your reference photo.
- Shade the deepest recesses first: the shadow under the upper eyelid, the pupil, the limbal ring, and the inner corners of the eye. Use softer pencils (2B to 4B) to build up these rich dark tones gradually.
Step 3: Rendering the Iris Complexity
- Lightly map out the highlight spots on the iris before shading.
- Use a sharp HB or 2B pencil to draw fine, radiating lines outward from the pupil. Vary the pressure to create natural irregularity. Leave tiny unshaded gaps or lift out highlights with a kneaded eraser to create a glossy, crystalline texture.
Step 4: Shading the Sclera and Eyeball Curvature
- Shade the upper portion of the sclera to indicate the shadow cast by the upper lid. Blend gently with a tortillion to ensure the transition is smooth, emphasizing the spherical roundness of the eyeball.
- Add subtle gray tones near the corners to reflect the moist tissues of the tear duct and caruncle.
Step 5: Defining Skin Textures, Folds, and Eyelashes
- Render the skin surrounding the eye, paying close attention to the upper eyelid crease and crow’s feet if present in the reference. Keep these lines soft and sensitive.
- Draw the eyelashes with confident, tapering strokes. Remember that lashes are thicker at the base where they emerge from the follicle and taper to fine, sharp points at the tips. Avoid making them look stiff or uniform like brush bristles.
Step 6: Final Highlights and Adjustments
- Use a precision eraser or a white gel pen to add the final, sharp catchlights on the cornea and iris. These highlights breathe life into the drawing, making the eyes look moist, alert, and luminous.
- Step back, compare your drawing to the reference photo, and deepen the contrast where necessary to make the features pop.
5. Overcoming Emotional and Technical Challenges
Creating a memorial portrait can be emotionally taxing, and artists often encounter unique hurdles along the way.
Managing Emotional Attachment
If you are drawing the eyes of a deceased family member or close friend, the emotional weight can make it difficult to remain objective about proportions and likeness.
- Take Breaks: Step away from the drawing every 30 minutes. Fresh eyes catch proportion errors that fatigue masks.
- Use the Mirror Trick: Hold your drawing up to a mirror or take a photo of it on your phone and flip the image horizontally. This instantly breaks your brain’s familiarity with the subject, allowing you to spot distorted angles or lopsided features immediately.
Dealing with Low-Quality or Damaged Reference Photos
Often, older family members only have grainy, faded, or damaged photographs available.
- Digital Enhancement: Before drawing, use basic digital photo editing tools (or AI enhancement tools specifically designed for old photos) to sharpen details, reduce noise, and clarify shadow boundaries.
- Artistic Interpretation: When details are obscured by grain or blur, rely on your understanding of human anatomy to logically reconstruct the shape of the eyelids and tear ducts rather than guessing blindly.
6. Preserving and Presenting the Finished Artwork
Once your deceased eyes drawing is complete, proper preservation ensures that this emotional keepsake lasts for generations without fading or smudging.
- Fixative Spray: Apply a light, even coat of workable or final fixative spray (in a well-ventilated area) to seal the graphite or charcoal particles to the paper surface and prevent smudging.
- Framing with a Mat (Passe-Partout): When framing, ensure there is a spacer or mat board between the glass and the drawing. If the glass presses directly against the paper, humidity can cause the graphite to adhere to the glass or trap moisture, ruining the piece.
- UV-Protected Glass: Recommend or use UV-filtering glass or acrylic to protect the paper and pigments from yellowing or fading over time when exposed to sunlight.
Conclusion
Drawing deceased eyes is much more than an exercise in technical realism; it is an act of love, remembrance, and profound respect. By combining a solid understanding of facial anatomy, meticulous observation of reference materials, and a patient, layered shading technique, artists can create powerful memorial portraits that offer comfort, preserve legacies, and keep the memory of cherished loved ones vibrantly alive through art.