


Capturing human emotion on paper is one of the most rewarding challenges for any artist. While drawing bright, wide-open eyes is common, depicting swollen eyes from crying introduces a profound layer of raw vulnerability, storytelling, and technical complexity. Whether you are illustrating a heartbroken character, capturing a moment of profound relief, or simply pushing your rendering skills to the next level, mastering puffy, tear-stained eyes will elevate your portraiture.
In this comprehensive guide, you will learn how to analyze the anatomical changes that occur around the eyes during and after heavy crying, understand the interplay of light and soft tissue puffiness, and follow a detailed step-by-step process to bring a realistic, emotionally heavy drawing to life.
Understanding the Anatomy of Crying Eyes
Before putting pencil to paper, it is essential to understand why and how the eye area changes when someone cries. Crying triggers a biological response where excess fluid builds up in the delicate tissues surrounding the orbit.
- Fluid Retention (Puffiness): The skin under the eyes and the upper eyelids swell due to increased blood flow and lymphatic fluid accumulation. This creates soft, pillowy mounds that mask the sharp skeletal structure of the eye socket.
- Redness and Irritation: The conjunctiva (the white part of the eye) and the lash lines become irritated and hyper-vascularized. While you may not always use bright red in a graphite or monochrome drawing, you must render darker tones and increased contrast along the rims to suggest irritation.
- Tears and Wetness: Tears alter how light reflects. Instead of a uniform matte surface, wet skin features sharp, bright specular highlights and dark, refractive pooling in the inner corners of the eyes and along the lower lash line.
- Sagging and Heavy Lids: The upper eyelids become heavy and gravitational pull causes them to droop, partially obscuring the iris and making the eyes look smaller, tired, and strained.
Essential Materials Needed
To render soft textures, harsh puffiness, and glistening moisture, gather the following tools:
- Drawing Paper: A smooth or medium-tooth sketch paper (such as Bristol smooth or Strathmore 400 series) allows for seamless blending.
- Graphite Pencils: A range from light to dark ($\text{H}$ or $2\text{H}$ for light outlines, $\text{HB}$ and $2\text{B}$ for midtones, and $4\text{B}$ to $6\text{B}$ for deep shadows).
- Blending Tools: Tortillions or soft makeup sponges for smoothing out puffiness.
- Erasers: A kneaded eraser (for lifting graphite softly and creating subtle highlights) and a precision monomark eraser (for sharp tear highlights).
- White Gel Pen: Optional, but excellent for adding crisp, wet highlights to tears.
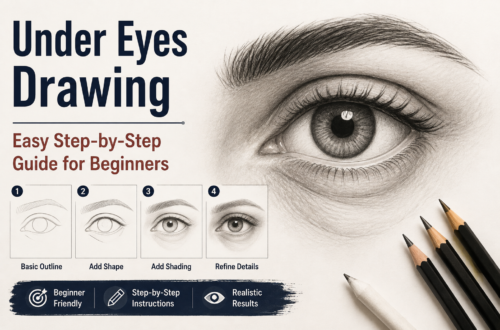
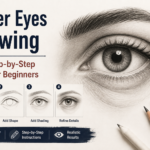
Step-by-Step Guide: Drawing Swollen Eyes From Crying
Step 1: Mapping the Proportions and Heavy Structure
Start with light, loose guidelines. Because the eyes are swollen, the standard proportions shift slightly.
- Lightly sketch the almond shape of the eyes, but draw the upper and lower lids thicker and heavier than usual.
- Indicate where the puffiness will sit: sketch soft, swelling bags directly beneath the lower lash line and heavy, sagging folds overlapping the crease of the upper eyelid.
- Keep your lines very light ($\text{H}$ pencil) so they can be easily blended or erased later. Real skin does not have hard outlines; it is defined by values and shadows.
Step 2: Blocking in the Base Tones and Shadows
Crying eyes are often set in a face marked by exhaustion, meaning shadows around the sockets are deeper.
- Using an $\text{HB}$ pencil, gently shade the eyeball itself, remembering that the upper lid casts a significant shadow over the iris and pupil.
- Shade the hollows of the eyes, the bridge of the nose, and the newly formed puffy folds.
- Establish the midtones on the skin surrounding the eye to give the face its initial dimension.
Step 3: Rendering the Puffy Lower Lids and Upper Folds
This is where the magic of the “crying effect” happens. Swollen skin behaves differently than normal skin—it has soft, rounded edges and pillow-like volume.
- Instead of sharp lines for wrinkles, use smooth gradients. The lower eyelid will look like a thick, raised cushion pressing upward against the eyeball.
- Use a $2\text{B}$ or $4\text{B}$ pencil to darken the crease directly beneath this lower puff, creating depth that pushes the swelling forward.
- On the upper eyelid, render the heavy, drooping skin fold. This fold often sags over the outer corner of the eye, creating a downward, melancholic slant.
- Blend these areas smoothly using a tortillion, ensuring no harsh pencil strokes remain on the flesh.
Step 4: Detailing the Eyes, Iris, and Wet Lashes
Even though the eyes are swollen, the focal point remains the eyeball and its expression.
- The Iris and Pupil: Draw the pupil dilated or fixed with emotion. Add subtle reflections inside the iris to mimic eyes swimming in unshed or freshly fallen tears.
- The Lash Line: Crying makes eyelashes clump together. Instead of drawing individual, fluffy lashes, group them into wet, spiky clusters using a sharp $4\text{B}$ or $6\text{B}$ pencil.
- Waterlines: Thicken the inner rim of both the upper and lower eyelids. Make them appear glossy by leaving a bright, sharp white highlight running along the very edge of the flesh.
Step 5: Adding Tears, Gloss, and Final Highlights
Tears change the texture of the face from dry skin to a reflective, wet surface.
- Pooling Tears: Darken the inner corner of the eye (the lacrimal caruncle) and add a bright white highlight sitting right inside the pool of moisture.
- Streaks Down the Cheeks: If extending the drawing down the face, draw faint, wavering paths where tears have tracked down. To make a tear track look realistic, use a kneaded eraser to lift a thin line of graphite, then outline the lower edge of that line with a dark pencil to create a 3D cylindrical effect.
- Skin Shine: Use your kneaded eraser to dab away tiny highlights on the swollen parts of the cheeks and under-eye bags, simulating damp skin that catches ambient light.
Tips for Enhancing Emotional Impact
- Contrast is Key: Deepen the shadows in the inner corners of the eyes and beneath heavy lids. High contrast draws the viewer’s eye straight to the exhaustion and grief captured in the gaze.
- Subtlety Over Exaggeration: Avoid making the swelling look like an allergic reaction unless intended. Keep the transitions soft and organic; crying puffiness is pillowy, not rigid.
- Reflect the Environment: In the wet highlights of the eyes and tears, remember that liquid acts like a mini mirror reflecting light sources from the room or sky.
Conclusion
Drawing swollen eyes from crying requires a shift from drawing standard anatomical features to rendering soft tissue, fluid dynamics, and raw human emotion. By focusing on heavy lids, pillowy under-eye bags, clumped lashes, and strategic wet highlights, you can transform a simple sketch into a powerful piece of art that resonates deeply with anyone who views it. Practice these steps patiently, and let your pencil capture the quiet intensity of human vulnerability.