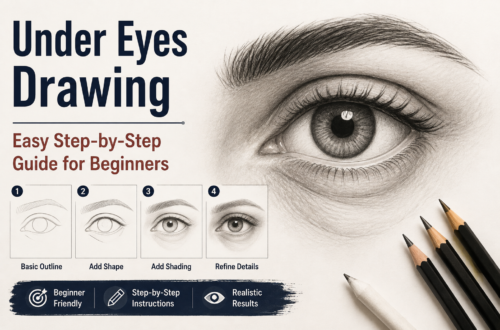





Mastering the human eye is often considered the ultimate milestone for any artist. Among the various styles and stylistic breakdowns, disc eyes drawing has emerged as a captivating technique that blends structured geometry with organic realism. Whether you are building a dedicated art portfolio, creating tutorials for a niche blog, or expanding your sketching repertoire, understanding how to approach the “disc” method of eye illustration will elevate your work.
This comprehensive, copyright-free guide walks you through every phase of the process, from foundational anatomy and conceptual sketching to advanced graphite rendering and digital optimization.
1. Understanding the Anatomy Behind Disc Eyes Drawing
Before putting pencil to paper, it is essential to grasp the core mechanics that differentiate standard eye sketches from a structured disc approach.
What is the “Disc” Concept?
In structural drawing, artists often simplify complex organic forms into basic geometric shapes—cylinders, spheres, boxes, and discs. When applied to the human eye:
- The Eyeball as a Sphere: The globe of the eye sits inside the bony socket (orbit).
- The Iris and Pupil as a Disc: The iris is not flat like a coin pasted onto a sphere; rather, it forms a protruding, lens-like disc or truncated cone sitting on the front of the eyeball.
- The Eyelids as Wrapping Planes: The upper and lower lids wrap around this spherical globe like fabric draped over a physical form.
By visualizing the iris and cornea combination as a distinct transparent disc protruding from the eye globe, you instantly gain control over perspective, depth, and three-dimensional realism.
2. Essential Tools and Materials
To achieve clean lines, smooth gradients, and deep contrast without relying on copyrighted reference images, gather the following professional-grade tools:
- Drawing Pencils: A graded range from 4H (for light layout lines) to HB (for mid-tones) and 4B–6B (for deep shadows and pupils).
- Paper: Smooth bristol board or heavy-weight drawing paper (100gsm to 150gsm) to prevent buckling when blending.
- Erasers: A kneaded eraser for lifting graphite gently, and a precision mechanical eraser for sharp highlights.
- Blending Tools: Tortillions or blending stumps (use sparingly to avoid muddying your textures).
3. Step-by-Step Tutorial: How to Execute a Disc Eyes Drawing
Follow this sequential, highly detailed workflow to construct a stunning, realistic eye from scratch.
Step 1: Establishing the Guidelines and Angles
- Draw a Horizontal Axis Line: Lightly sketch a slightly curved horizontal line across your paper to set the tilt of the eye.
- Map the Bony Orbit: Lightly block in the oval shape of the eye socket. This helps place the tear duct (medial canthus) and the outer corner (lateral canthus) accurately.
- Locate the Center Disc: Sketch a light circle where the iris will reside. Remember that depending on the gaze direction, this circle will compress into an oval or ellipse due to perspective.
Step 2: Constructing the Disc (Iris and Pupil)
- Define the Outer Ring: Darken the perimeter of your iris circle. Think of this outer edge as the rim of a disc.
- Inscribe the Pupil: Place the circular pupil precisely in the center of the iris disc.
- Add Depth (Corneal Bulge): Because the cornea domes outward over the iris, remember that light hitting this disc creates a distinct refraction effect. Leave white paper untouched for your primary specular highlights.
Step 3: Layering the Eyelids and Skin Folds
- The Upper Lid Thickness: The upper eyelid is not a single line; it has physical thickness and casts a natural shadow down onto the eyeball. Draw a parallel contour line just above the main lash line.
- The Crease: Sketch the upper eyelid crease, which curves gracefully over the eyeball, mimicking the underlying spherical form.
- The Lower Lid and Lash Line: Draw the thinner lower lid, keeping the line delicate. Indicate the wet line (waterline) just inside the lower lashes.
Step 4: Shading the Iris Disc
The iris contains intricate, radial striations that radiate outward from the pupil like spokes on a wheel or fibers on a disc.
- Base Tone: Lay down a light layer of HB graphite across the entire iris, leaving the highlight clean.
- Radial Lines: Using a sharp 2B pencil, draw fine, organic lines outward from the pupil. Vary the pressure so some lines are dark and prominent while others fade into the background.
- Limbal Ring Shading: Darken the outer perimeter of the iris disc heavily. This “limbal ring” gives the eye its intense definition, youthfulness, and realism.
Step 5: Rendering the Whites of the Eye (Sclera) and Tear Duct
- Avoid Pure White: The sclera is a curved, spherical surface, not a flat white sheet. Shade it gently near the corners and underneath the upper eyelid where shadows fall.
- The Tear Duct: Render the caruncle (the pinkish tissue in the inner corner) with soft, rounded contours, adding a wet, glossy highlight to make it look organic and alive.
Step 6: Eyelashes and Eyebrows
- Lash Growth Patterns: Eyelashes grow in clusters and curve outward and upward (for the top lid) and downward (for the bottom lid). Never draw them as stiff, straight spikes.
- Varying Lengths: Layer fine, overlapping hairs using a sharp 4B pencil for maximum realism.
- Eyebrows: Follow the natural hair growth direction, keeping strokes light and feathery near the bridge of the nose and sweeping outward toward the temple.
4. Advanced Tips for Professional Results
- Control Your Values: Ensure your darkest dark (the pupil and upper lash line shadow) contrasts sharply with your brightest white (the primary catchlight on the cornea). High contrast creates depth.
- Maintain Texture Integrity: When blending, avoid over-smoothing the skin around the eye. Real human skin has pores and fine textures; retaining subtle pencil hatch marks adds organic warmth.
- Perspective Accuracy: If your subject is looking to the side, compress the iris disc horizontally into an oval, ensuring the pupil shifts proportionally with it.
5. Frequently Asked Questions (FAQ)
What makes disc eyes drawing different from traditional eye drawing?
Disc eyes drawing emphasizes treating the iris and cornea as a distinct geometric disc protruding from a sphere. This helps artists accurately map out lighting, reflections, and perspective distortion.
What pencil grades are best for realistic eye sketches?
A combination of 4H for initial light guidelines, HB for mid-tone skin shading, and 4B to 6B for dark pupils and eyelashes yields the best tonal range.
How do I prevent my shading from looking muddy?
Always build your values up in layers rather than pressing down hard immediately. Use a kneaded eraser to lift excess graphite instead of smudging with your fingers.
Conclusion
Mastering disc eyes drawing transforms your approach to portraiture from guesswork into a structured, reliable science. By breaking down complex eye anatomy into manageable geometric planes—specifically treating the iris as a dimensional disc—you can achieve striking realism, accurate perspective, and deep emotional resonance in your artwork. Practice these steps consistently, refine your value scales, and watch your artistic proficiency soar.