Introduction
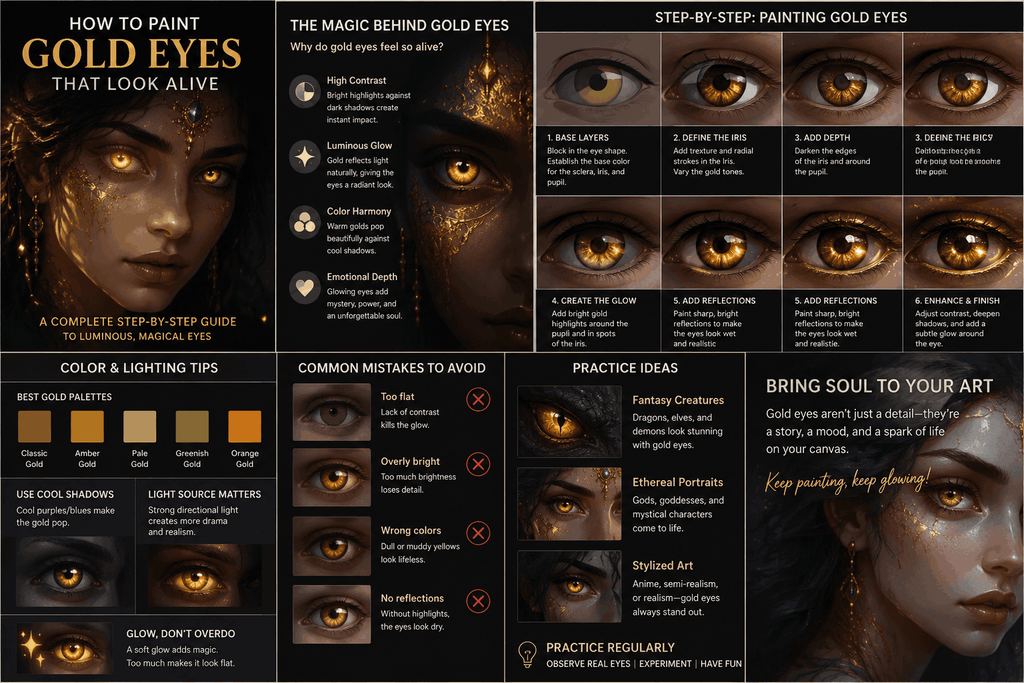
Capturing the essence of a living gaze on canvas or digital media is one of the most rewarding challenges for any artist. When you introduce light into an artwork, especially in the form of magical or otherworldly glowing gold eyes, the entire portrait transforms. Suddenly, the piece possesses depth, mystery, and an undeniable heartbeat.
Whether you are painting a fantasy creature, an ethereal deity, or a stylized human portrait, mastering the illusion of luminescence is entirely achievable. This comprehensive guide will walk you through everything you need to know to paint captivating, lifelike gold eyes that truly look alive.
1. Understanding the Anatomy of a Living Eye
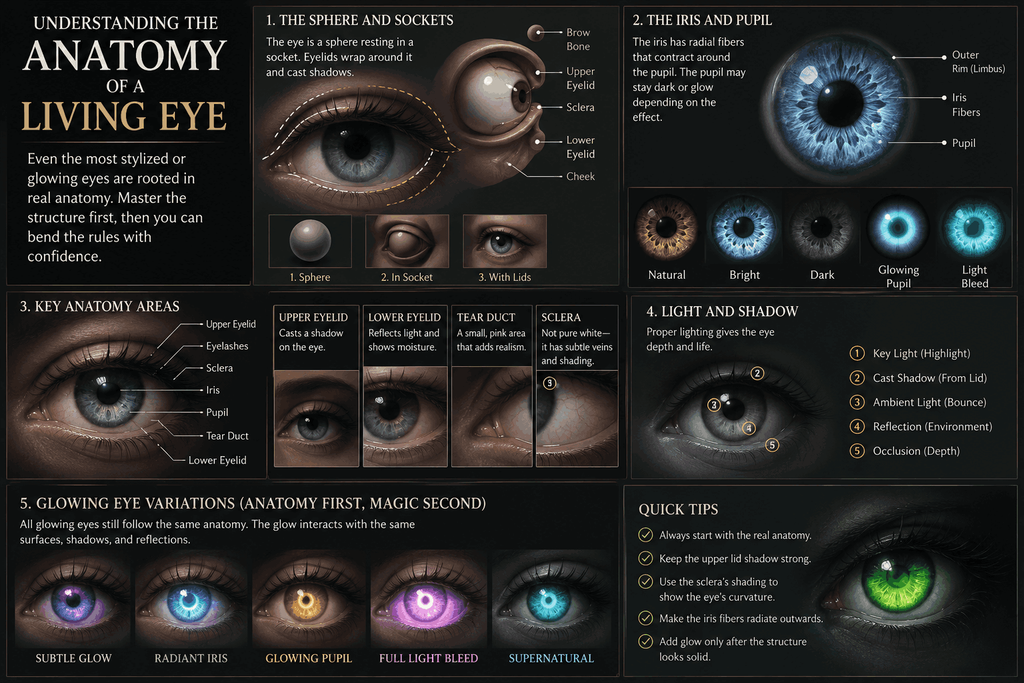
Before introducing color, highlights, and magical glow effects, it is vital to understand the foundational anatomy of the eye. Even the most stylized glowing eyes rely on real-world structures to maintain a sense of realism and three-dimensionality.
The Sphere and Sockets
An eye is not a flat circle pasted onto a face; it is a sphere resting within a fleshy socket. The eyelids wrap around this sphere like fabric draped over a ball. Always shade the upper eyelid to cast a natural shadow down onto the iris and sclera. This immediate contrast gives the eye depth and prevents it from looking flat or pasted on.
The Iris and Pupil
The iris is textured like a radiating starburst, with fibers pulling outward from the central pupil. In glowing eyes, the pupil often remains dark to contrast with the bright aura, or it can bleed light depending on the intensity of the magical effect.
2. Choosing Your Color Palette for Radiant Gold
Gold is a reflective, metallic color that relies heavily on a range of tones rather than a single flat yellow. To make your gold look rich and luminous, you need a balanced spectrum of darks and lights.
- Deep Umber / Burnt Sienna: Used for the deepest shadows, the outer limbal ring, and the pupil edge. This anchors the eye and provides the necessary contrast.
- Warm Ochre / Medium Yellow: The mid-tones that form the base body of the gold iris.
- Bright Lemon Yellow / Metallic Gold: Used for the primary areas catching the light.
- Pure White: Essential for the sharpest specular highlights that sell the illusion of moisture and intense illumination.
3. Step-by-Step Guide to Painting Glowing Gold Eyes
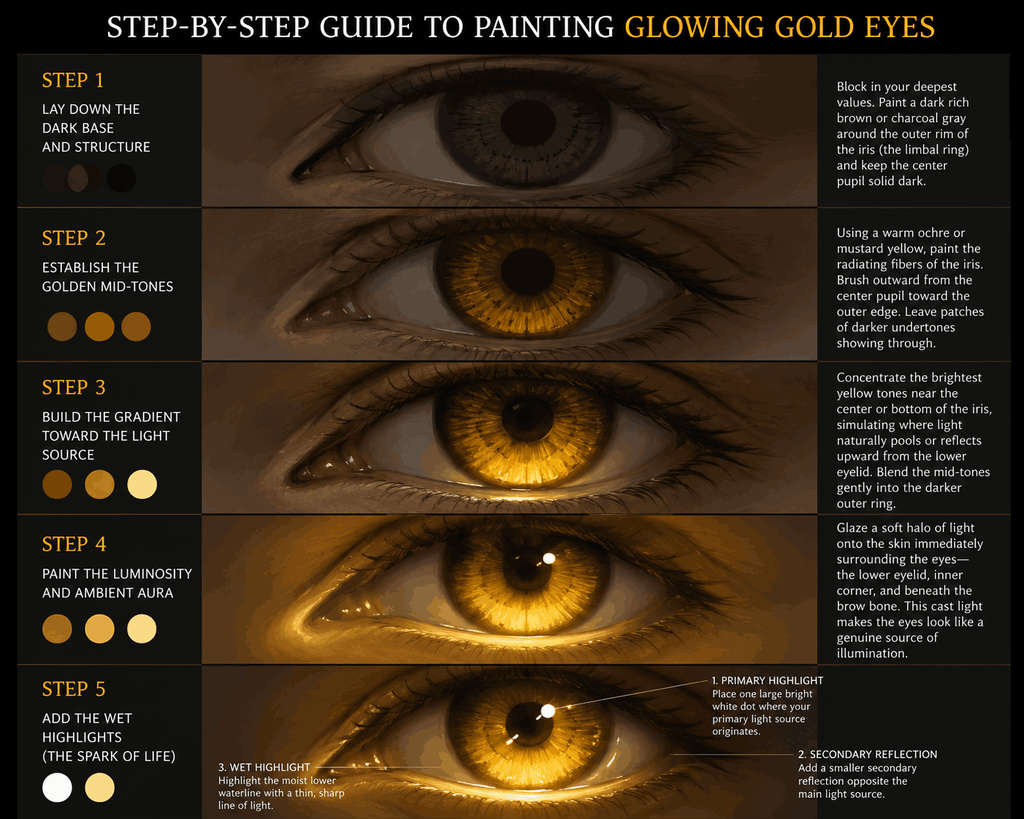
Follow this structured, step-by-step process to build up your glowing gold effect from a blank canvas to a striking, vibrant finish.
Step 1: Lay Down the Dark Base and Structure
Start by sketching the almond shape of the eye, paying careful attention to the tear duct and the thickness of the eyelids. Block in your deepest values first. Paint a dark, rich brown or charcoal gray around the outer rim of the iris (the limbal ring) and keep the center pupil solid dark. This establishes your dark foundation, which makes the upcoming bright highlights pop.
Step 2: Establish the Golden Mid-Tones
Using a warm ochre or mustard yellow, paint the radiating fibers of the iris. Brush outward from the center pupil toward the outer edge. Do not worry about perfection; organic irregularities make the eye look more natural and alive. Leave patches of darker undertones showing through to create texture and depth.
Step 3: Build the Gradient Toward the Light Source
To create a true glowing effect, your values must transition smoothly from dark to bright. Concentrate the brightest yellow tones near the center or bottom of the iris, simulating where light naturally pools or reflects upward from the lower eyelid. Blend the mid-tones gently into the darker outer ring so the color appears to radiate outward.
Step 4: Paint the Luminosity and Ambient Aura
This is where the magic happens. Select a soft, semi-transparent brush with a bright yellow or white pigment. Gently glaze a soft halo of light onto the skin immediately surrounding the eyes—the lower eyelid, the inner corner, and beneath the brow bone. This cast light convinces the viewer’s brain that the eyes are a genuine source of illumination rather than just painted yellow spots.
Step 5: Add the Wet Highlights (The Spark of Life)
The final step is adding crisp, sharp white dots and streaks to represent specular highlights.
- Place one large, bright white dot where your primary light source originates (often overlapping the edge of the pupil and iris).
- Add a smaller secondary reflection opposite the main light source to show ambient bounce light.
- Highlight the moist lower waterline of the eye with a thin, sharp line of light to give the eyeball its wet, glossy appearance.
4. Pro Tips for Extra Realism and Impact
- Vary Your Edge Hardness: Keep the outer edge of the iris slightly soft where it meets the white of the eye, but keep the pupil edge and the primary highlights razor-sharp.
- Incorporate Secondary Tones: Real gold reflects its environment. Introduce subtle hints of warm orange, soft peach, or even cool sky-blue reflections in the highlights to make the gold look dynamic and rich.
- Don’t Over-Blur: While glowing effects often involve soft glows, the core of the iris and the eye reflections must remain crisp to retain focus and intensity.
Conclusion
Painting glowing gold eyes is all about balancing deep foundational shadows with brilliant, well-placed highlights and cast light. By treating the eye as a three-dimensional sphere and building your colors from rich umbers up to blazing yellows, you can create a gaze that feels magnetic, powerful, and truly alive. Grab your brushes or stylus, take it one step at a time, and watch your artwork come to life!
Would you like tips on how to paint realistic skin textures around these glowing eyes?