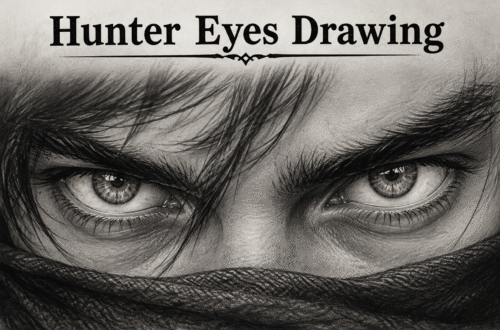
The eyes are the most captivating element of any portrait. Often called the “window to the soul,” they hold a unique power to convey personality, emotion, and intent. Whether you are a beginner looking to improve your sketching skills or an experienced artist seeking to deepen the psychological impact of your work, understanding the interplay between art and psychology is essential.
The Psychology of the Gaze
Have you ever looked at a portrait and felt like the subject was staring directly back at you? This isn’t just an artistic trick; it is biology meeting art. Our brains are hardwired to prioritize faces, and within the face, the eyes carry the highest “informational density.”
When we interact with others, we use eye contact to gauge trust, emotion, and intent. In portraiture, this instinct becomes the artist’s most powerful tool. By choosing where the subject looks, you control the viewer’s experience:
- Direct Eye Contact: This creates intimacy, confrontation, or engagement. It makes the viewer feel “seen,” pulling them into the narrative of the painting.
- Averting the Gaze: Directing the eyes away from the viewer creates a sense of contemplation, distraction, or privacy. The viewer becomes a voyeur, peeking into a private moment rather than participating in one.
Understanding these psychological dynamics allows you to use your artwork to tell a deeper story. It is the difference between simply documenting features and bridging the gap between the canvas and the viewer.
Decoding the Shape: The Role of Geometry
Every element of the eye’s shape contributes to the character’s perceived personality. Even subtle changes in eyelid angles or iris shape can shift the “vibe” of your portrait:
- Circle-Shaped Eyes: These often convey innocence, softness, and youth.
- Triangle/Sharp Shapes: Often associated with danger, sharpness, or predictability, these are frequently used in villainous or highly energetic character designs.
- Droopy Eyelids: These suggest a laid-back, weary, or shy disposition.
- High-Angled Eyelids: These convey alertness, intensity, or a sense of impending action.
By experimenting with these shapes, you can create a vast range of expressions before you even begin to add details.
Technical Guide: Drawing Realistic Eyes
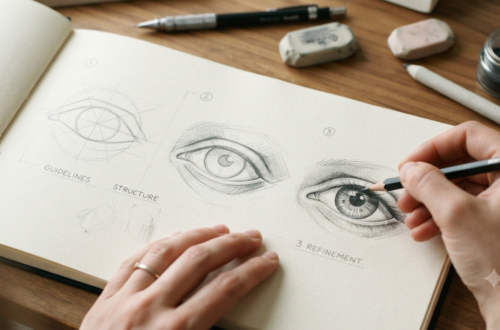
Capturing the complexity of an eye on a flat surface requires more than just drawing an oval. To achieve a 3D effect, you must understand the eye as a sphere sitting within a socket.
1. Establishing the Structure
Begin by sketching the general shapes. Many artists prefer to “block in” the structure first—identifying the pupil, the iris, the eyelids, and the tear duct. Remember, the iris is rarely a perfect circle; it is often partially obscured by the upper eyelid. Overlooking this detail can make the eye look “surprised” or “wide-eyed” unintentionally.
2. Working in Layers (The Inside-Out Approach)
The eye is a complex, layered structure. Start by establishing your darkest values—the pupil and the outer edge of the iris—using a soft pencil (like a 4B). Once the foundation is dark, use a harder pencil (like a 2H) to add subtle variations in the iris. The iris has a “spoke-like” pattern that radiates from the pupil; mimicking this pattern is key to realism.
3. Creating Depth with Highlights and Shadows
The “shine” in an eye—the specular highlight—is what makes it look alive. Always block out your highlights early by leaving those areas of the paper blank. If you fill them with pigment, you lose the clean, crisp contrast that defines the reflective surface of the cornea.
Don’t forget the white of the eye (the sclera). A common mistake is leaving it pure white. In reality, the sclera is a sphere, and it requires subtle shading to show depth, particularly near the corners and under the upper eyelid.
4. The “Icing on the Cake”: Eyelashes and Brows
Resist the urge to draw individual eyelashes too early. They are the final touch. Eyelashes are not straight lines; they grow in curves from the follicle. Focus on their direction and thickness—the upper lashes are typically thicker and more pronounced than the lower ones. Similarly, when drawing eyebrows, use feathery line strokes that follow the natural direction of hair growth rather than drawing one solid, blocky shape.
Visual Hierarchy: Guiding the Viewer
In a successful portrait, the eyes should be the “anchor point.” Your brain is efficient—it wants to find the eyes as quickly as possible. To guide the viewer:
- Prioritize Contrast: Ensure the eyes have the sharpest details and the highest contrast in the entire piece.
- Soften the Surroundings: By keeping the iris and cornea crisp while slightly softening the surrounding skin and hair, you mimic human optical focus, tricking the brain into perceiving depth.
Conclusion
Drawing eyes is a balancing act between technical precision and emotional storytelling. Whether you are aiming for hyper-realism or expressive, stylized art, the goal remains the same: to create a connection. By mastering the anatomy, respecting the psychological weight of the gaze, and carefully managing your light and shadow, you can transform a simple drawing into a powerful, emotive piece of art.
Keep practicing, observe your own eyes in the mirror, and don’t be afraid to experiment with how different shapes and gazes change the narrative of your portraits. Your journey toward better art begins one sketch at a time.