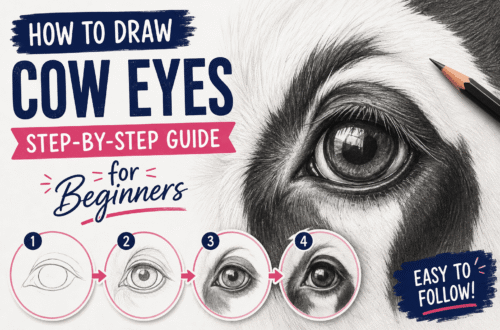
Drawing a realistic human eye is often considered a rite of passage for aspiring artists. The old proverb claims that “the eyes are the window to the soul,” but in the world of fine art, they are a masterclass in texture, geometry, light, and shadow.
Many beginners struggle with eye drawings because they draw what they think they see rather than what is actually there. They draw flat symbols—a perfect football shape for the eyelids, a solid black circle for the pupil, and stiff, straight lines for the eyelashes. The secret to hyper-realism is breaking down those symbolic habits and looking at the eye as a three-dimensional sphere wrapped in soft skin.
Whether you are looking to improve your sketchbook entries or master fine graphite portraits, this comprehensive guide will teach you how to draw a realistic eye step-by-step.
1. Essential Tools for Hyper-Realistic Drawing
Before putting pencil to paper, gathering the right materials is crucial. Hyper-realism relies heavily on capturing a broad range of values—from the deepest, darkest blacks of the pupil to the bright white highlights reflecting off the wet surface of the cornea.
- Graphite Pencils (Range 2B to 8B): Use a harder pencil like a H or HB for your initial light sketch. Shift to soft pencils like a 2B or 4B for building mid-tones, and an 8B or 9B for achieving deep, rich blacks in the pupil.
- Blending Stumps (Tortillons): Essential for smoothly blending graphite to replicate the soft texture of human skin and the gradient of the eyeball.
- Kneaded Eraser: Unlike stiff plastic erasers, a kneaded eraser can be molded into sharp points to lift tiny bits of graphite, making it perfect for creating realistic skin pores, iris textures, and fine highlights.
- Precision Mono Zero Eraser: A mechanical, ultra-thin eraser used for carving out fine lines, such as individual hair strands in the eyebrows or sharp reflections in the iris.
- High-Quality Drawing Paper: Opt for smooth, medium-weight bristol board or fine-grain sketching paper. Heavy texture (or “tooth”) makes smooth skin blending exceptionally difficult.
2. Understanding the 3D Anatomy of the Eye
To draw an eye realistically, you must understand its underlying structure. The human eye is not a flat shape; it is an entirely round sphere nestled inside a bony socket. The eyelids are thin sheets of skin stretched tightly over this sphere, meaning they must curve around its volume.
Understanding the underlying spherical anatomy of the eye. Source: Clip Studio TIPS – Clip Studio Start
When light hits this spherical object, it creates specific shadow patterns:
- The Sclera (The White of the Eye): It is never purely white. Because it is a sphere, the sides curve away from the light source, meaning the corners of the eye must be shaded to look round.
- The Eyelid Thickness: The eyelids have a visible edge or “waterline” where the eyelashes actually grow. Failing to draw this edge is the number one reason eye drawings look flat.
3. Step-by-Step Tutorial: Drawing a Realistic Eye
Follow these core developmental stages to bring your drawing to life. Take your time with each phase—patience is the ultimate tool in hyper-realistic sketching.
Step-by-step realistic eye drawing progression. Source: The Drawing Source
Step 1: Establish the Initial Outline (The Contour)
Using a sharp HB pencil, lightly sketch the overall shape of the eye. Avoid pressing down hard; these lines should be just visible enough to guide you.
- Sketch the main almond-like curve of the upper and lower eyelids.
- Mark the tear duct (caruncle) at the inner corner. It resembles a small, soft triangle.
- Draw the circular iris. Remember that in a relaxed, resting eye, the top portion of the iris is usually covered slightly by the upper eyelid.
- Sketch the pupil exactly in the center of the iris.
- Crucial Tip: Block out your highlight shapes inside the pupil and iris right now. Do not shade inside these highlight shapes; keep them pure white.
Step 2: Lay Down the Deepest Darks
Switch to your darkest pencil (such as a 6B or 8B). Carefully fill in the pupil, skipping over the highlight shapes you blocked out in Step 1.
Next, darken the upper eyelid crease. The upper lid casts a physical shadow down onto the eyeball, so making this line bold and dark establishes a strong sense of depth early on.
Step 3: Shading the Iris and Creating Depth
The iris is a muscle made up of thousands of tiny fibers radiating outward from the pupil.
- Begin by shading a dark ring around the outer edge of the iris (the limbal ring).
- Using a 2B pencil, draw fine, organic lines radiating outward from the edge of the pupil to the outer ring. Leave some areas slightly lighter to mimic the natural, chaotic patterns of a real eye.
- The Contrast Rule: To make the eye look wet and glassy, make the area of the iris directly opposite your main highlight slightly lighter. If your highlight is at the top-left, add a soft, bright gradient to the bottom-right of the iris.
Step 4: Shading the Sclera (Eyeball Volume)
As established, the “white” of the eye is rarely pure white. Using a soft blending stump loaded with a tiny amount of leftover graphite from your pencil, softly shade the outer corners of the eyeball.
- Blend inward, keeping the center of the eyeball closest to the iris the brightest.
- Apply a cast shadow directly beneath the upper eyelid. This creates the illusion that the eyelid sits on top of the eyeball.
Step 5: Rendering Eyelids, Tear Ducts, and Surrounding Skin
Skin requires soft gradients. Use your blending stump to spread graphite around the upper crease and below the lower eyelid.
- The Waterline: Leave a thin, highlight-filled strip of completely unshaded paper along the rim of the lower eyelid. This represents the wet ledge where tears pool.
- The Tear Duct: Use a mid-tone pencil (2B) to give the tear duct a fleshy, rounded appearance. Add a tiny, sharp highlight using your mechanical eraser to give it a wet look.
Step 6: Drawing Realistic Eyelashes
This is where many artists accidentally ruin their progress. Eyelashes do not grow upward like straight spikes; they curve downward first before swooping out and upward.
Incorrect (Stiff, straight lines):  |  |  |  |
Correct (Curved, grouped roots):   /  /  /  /
- Group Them Naturally: Eyelashes grow in overlapping clumps of two or three hairs that cross over each other.
- Vary the Length: Eyelashes near the tear duct are incredibly short and fine, while eyelashes at the outer edge are longer and more swept out.
- Lower Eyelashes: These are much thinner, shorter, and sparser than the top lashes. Ensure they sprout from the bottom edge of the waterline, not directly against the eyeball.
Step 7: Adding the Eyebrow and Fine Details
An eye looks incomplete without its frame. To draw a realistic eyebrow, avoid shading a solid block of color. Instead, use sharp, flicking motions with a 3B pencil to draw individual hairs following the direction of natural growth (upward at the front, turning sideways and downward across the arch).
4. Pro-Tips for Achieving Photo-Realism
| Common Mistake | Hyper-Realistic Solution |
|---|---|
| Flat, pure white eyeballs | Add gentle gradient shading into the corners of the sclera using a blending stump. |
| Spider-leg eyelashes | Draw hairs with a flicking motion, tapering off at the tip, and clump them in small clusters. |
| Matte, lifeless finish | Use a sharp Mono Zero or kneaded eraser to pick out tiny micro-highlights on the wet areas. |
Pro Tip: Look closely at your reference photo. You will often see the reflection of the eyelashes cast inside the main highlight of the iris. Copying this tiny detail will instantly elevate your drawing into the realm of professional hyper-realism.
5. Conclusion
Learning how to draw a realistic eye is an exercise in seeing the world as a camera does—noticing the minute shifts in tone, the subtle curves of anatomy, and the play of reflection. Don’t be discouraged if your first attempt looks asymmetrical or flat. Hyper-realism is a skill built entirely on muscle memory and analytical observation.
Keep your pencils sharp, observe your reference photo more than your own paper, and let your confidence grow with every layer of graphite you lay down.
Ready to expand your artistic skills? Check out these advanced guides:
Master graphite pencil shading techniques
Learn how to draw a realistic human nose
How to map facial proportions accurately