I. Introduction
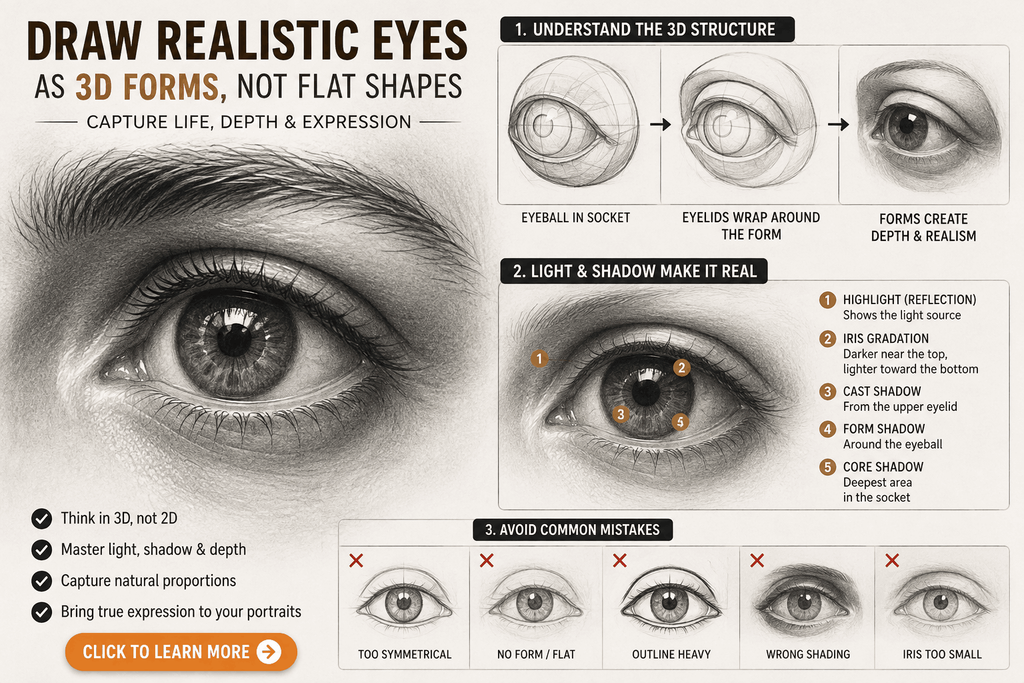
Every artist knows the old saying: “The eyes are the window to the soul.” In portrait drawing, capturing an expressive, realistic eye can instantly breathe life into your entire piece. However, many beginners struggle with achieving symmetry, understanding how light interacts with curved surfaces, or avoiding flat, cartoonish outlines. By approaching the eye not as a flat drawing, but as a three-dimensional sculptural form resting inside a socket, you can completely transform your drawing technique.
II. Essential Materials Checklist for Realism
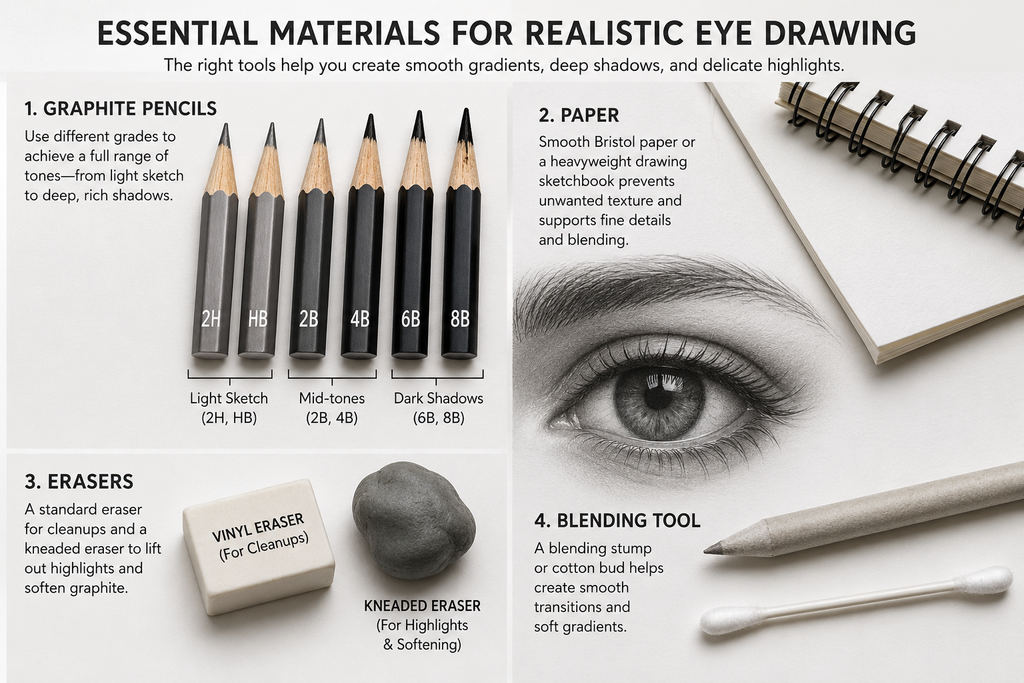
Before putting pencil to paper on eyesdrawings.com, gathering the right materials will make achieving smooth gradients and deep shadows much easier:
- Graphite Pencils: Use an HB or 2H pencil for light initial sketching, a 2B or 4B for mid-tones, and a 6B or 8B for the darkest shadows (like the pupil and upper lash line).
- Paper: Smooth Bristol paper or a heavyweight drawing sketchbook prevents unwanted paper texture from interrupting your fine lines.
- Erasers: A standard vinyl eraser for cleanups and a kneaded eraser to lift out delicate highlights and soften graphite seamlessly.
- Blending Tool: A blending stump or cotton bud to smooth out graphite transitions gently.
III. Step 1: Grasping Basic Anatomy and Proportions
An eye is a sphere resting inside a bony socket, wrapped by flexible folds of skin.
- The Underlying Sphere: Lightly sketch a complete circle. Visualize the eyelids as cloth draped smoothly over this ball.
- The Almond Outline: Draw a soft almond shape over your sphere. The inner corner (near the tear duct) should point slightly downward, while the outer corner sits higher. Keep your guidelines very faint so they can be easily erased later.
IV. Step 2: Mapping Internal Elements (Iris, Pupil, and Highlights)
With your outer framework set, map out the inner structures:
- The Iris: Draw a large circle right in the center. Remember that the upper and lower eyelids cut off the top and bottom portions of this circle.
- The Pupil: Inside the iris, draw a smaller, perfectly centered solid circle.
- The Highlight: Decide where your light source is coming from and reserve a small, unshaded shape inside the pupil and iris to act as the primary light reflection. This sparkle gives the eye its living quality.
V. Step 3: Deepening Contrast and Shading the Pupil
Contrast is the secret weapon of realistic drawing.
- Using your softest, darkest pencil (like a 6B or 8B), fill in the pupil completely, maneuvering carefully around your designated highlight.
- Establish a dark, crisp border around the outer rim of the iris to separate it cleanly from the whites of the eyes.
VI. Step 4: Rendering Iris Texture and Depth
The human iris features an intricate network of fibers, crypts, and rings.
- Use a sharp pencil to draw fine, organic lines radiating outward from the pupil like spokes on a wheel.
- Softly blend the mid-section of the iris with a blending stump, allowing the textures to blur into a luminous gradient while keeping the outer edge distinct.
VII. Step 5: Shading the Sclera (Whites of the Eyes) and Eyelids
A common beginner mistake is leaving the whites of the eyes pure, unshaded white.
- The Upper Shadow: Shade the top portion of the sclera gently with a light graphite wash to simulate the shadow cast by the upper eyelid.
- The Thickness: Outline the thickness of the lower waterline to give the eyelid physical mass.
- The Crease: Darken the upper eyelid crease firmly, as this fold creates deep shadows that give the eye structural depth.
VIII. Step 6: Mastering Eyelashes and Eyebrows
The finishing touches pull the entire piece together:
- Eyelashes: Never draw eyelashes as stiff spikes. Use swift, confident, curving strokes. Make them longer, thicker, and denser along the upper lid, and shorter and sparser along the bottom lid.
- Eyebrows: Lightly sketch hair strands flowing in the natural direction of growth, following the brow bone above the eye crease.
- Cleanup: Use your kneaded eraser to lift away stray smudges and punch up the brightness of your highlights.
IX. Expert Pro-Tips for Lifelike Results
- Avoid Hard Outlines: In reality, objects are defined by light and shadow, not heavy ink lines. Soften your outer eyelid edges into the surrounding skin.
- Layer Gradually: Build up your dark values in multiple light layers rather than pressing down hard right away.
- Study Reference Photos: Keep a mirror nearby or examine high-resolution macro photography of eyes to understand how light catches different surfaces.
X. Conclusion and Next Steps
Mastering the human eye takes patience, observation, and regular practice. By breaking down the structure into simple layers—from the initial sphere and iris placement to the final delicate eyelashes—you can create striking, realistic portraits with confidence. Keep experimenting on eyesdrawings.com as you build your artistic portfolio!
What specific facial feature or drawing tutorial would you like to explore next on eyesdrawings.com?