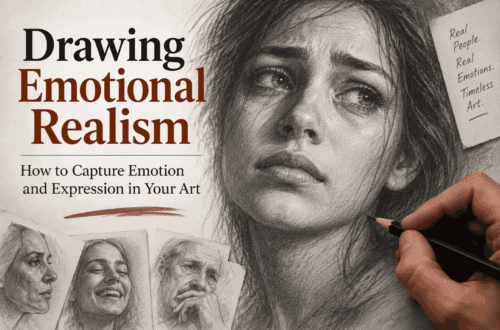
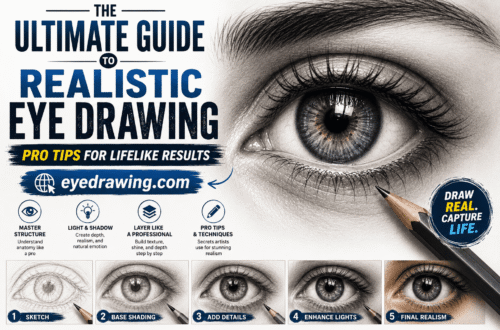
Eyes are universally known as the window to the soul, and in character design, they hold the ultimate power. Whether you are sketching a fierce fantasy warrior, a mysterious anime protagonist, or an expressive creature, introducing a vibrant amber or sunset hue can instantly elevate your artwork. Mastering an orange eyes drawing requires more than just filling a space with color; it demands an understanding of light physics, rich color theory, texture building, and emotional resonance.
This comprehensive guide will walk you through everything you need to know to create stunning, luminous orange eyes—covering structural anatomy, step-by-step rendering for both realistic and stylized art, color selection, and advanced finishing touches.
1. Understanding the Anatomy and Psychology of Orange Eyes
Before putting pencil or stylus to paper, it helps to understand what makes eyes look convincing and why orange carries such a unique psychological weight.
The Symbolic Power of Orange
In visual storytelling, orange is a color of high energy, warmth, danger, magic, and mystery. When applied to a character’s eyes, it can signify:
- Supernatural power or fire magic in fantasy or RPG character concepts.
- Fierceness and wild intuition (reminiscent of predatory animals like foxes, tigers, or hawks).
- Intense emotional warmth or a striking, memorable personality in anime and illustration.
Key Anatomical Landmarks
An eye is not a flat disk; it is a sphere set inside a socket, covered by fleshy eyelids. To pull off a successful orange eyes drawing, keep these structures in mind:
CLIP STUDIO PAINT
- The Sclera: The white of the eye, which should rarely be stark white. Shading it with soft grays, pinks, or purples creates a 3D spherical form. tips.clip-studio.com
- The Iris: The colorful ring that will house our gradients of orange, yellow, and brown.
- The Pupil: The dark center that expands and contracts based on light and emotion. tips.clip-studio.com
- The Cornea: The clear, dome-like outer layer that creates wet reflections and glossy highlights.
- The Upper Eyelid Shadow: A crucial element where the upper lid casts a deep shadow over the top portion of the iris, instantly adding depth.
2. Essential Materials for Your Orange Eyes Drawing
Depending on your medium of choice, having the right toolkit makes blending and texturing significantly easier.
- For Traditional Colored Pencils: Look for rich pigments with high lightfastness. Essential shades include cadmium orange, burnt ochre, raw sienna, dark chocolate brown, deep maroon, and canary yellow. A white gel pen or kneaded eraser is mandatory for sharp highlights.
- For Digital Artists (Procreate, Photoshop, Clip Studio Paint): Set up a canvas of at least 300 DPI. Utilize a soft airbrush for gradients, a textured brush for iris fibers, and set your blending modes to Overlay, Multiply, and Add (Glow) to make the orange pop.
3. Step-by-Step Guide: How to Draw Luminous Orange Eyes
Let’s break down the process into manageable phases, from initial construction lines to the final polished highlights.
Step 1: Mapping the Basic Shape and Proportions
Start by sketching the overarching shape of the eye. An almond shape is the standard baseline for human or humanoid characters, but you can slant it for a sharper, more aggressive expression or round it for a softer look.
wikiHow
- Lightly draw a horizontal guideline. wikiHow
- Sketch the upper eyelid arc, making it thicker and bolder toward the outer edge to represent eyelashes.
- Outline the lower lid more softly.
- Draw a complete circle for the iris inside the eye shape, ensuring it is partially clipped by the upper and lower eyelids (eyes are rarely shown as completely floating circles unless the character is wide-eyed with shock). wikiHow
Step 2: Establishing the Pupil and Fiber Radiations
Right in the center of the iris, draw a sharp, solid black or deep charcoal pupil.
Next, use light pencil strokes or digital lines to draw fine radiating fibers stretching outward from the pupil toward the outer rim of the iris. Think of these lines like the spokes of a wheel or sun rays. This texture is vital because an eye rendered as a flat orange circle will look lifeless; the fibers give it organic depth.
wikiHow
Step 3: Laying Down the Base Colors
Orange is a dynamic color that thrives on contrast. Avoid using just one flat shade of orange.
- The Core Gradient: Fill the iris with a warm, mid-tone yellow-orange as your base layer.
- The Perimeter Shadow (Limbal Ring): Around the outer edge of the iris, layer a deep burnt sienna or dark reddish-brown. This creates a natural frame that stops the eye from looking like it’s glowing unnaturally (unless that’s the fantasy effect you want!).
- The Pupil Bleed: Blend a touch of dark brown or rust around the inner border near the pupil.
Step 4: Adding Depth with Rich Shadows
The secret to a realistic or semi-realistic orange eyes drawing is shadow mapping.
- Top-Down Shading: Shade the top third to half of the iris with a dark chocolate brown or deep maroon. Because the upper eyelid casts a natural shadow downward, the top of the iris should always be the darkest part. wikiHow
- Warm Undertones: Introduce touches of red or deep amber into the mid-sections to create fiery complexity. If you want a striking contrast, add subtle hints of complementary cool tones (like a faint navy blue or teal) in the shadowed corners of the sclera or deep inside the iris crevices.
Step 5: Highlighting and Creating the “Wet” Look
This is where the magic happens. Highlights transform a dull drawing into a living, breathing gaze.
- Primary Catchlight: Place a large, crisp white circle or oval near the top edge of the iris, overlapping slightly with the pupil and upper eyelid. This mimics a window or light source reflecting off the wet cornea. wikiHow
- Secondary Reflection: Place a smaller, softer secondary highlight on the opposite lower side of the iris to simulate ambient room light bouncing back up.
- Waterline Highlights: Run a clean white or pale pink highlight along the lower inner rim (the waterline) to give the eye moisture and dimension. wikiHow
Step 6: Rendering Eyelashes, Skin Folds, and Eyebrows
An eye cannot exist in isolation; it interacts heavily with the surrounding skin.
- Eyelashes: Draw thick, sweeping eyelashes originating directly from the upper eyelid line. Avoid making them look like stiff sticks; give them a graceful curve that follows the contour of the eye. wikiHow
- The Crease: Draw the upper eyelid crease line a few millimeters above the eye shape, adding a soft shadow underneath it.
- The Epicanthic Fold / Tear Duct: Detail the inner corner (lacrimal caruncle) with a soft pinkish-peach tone to ground the eye anatomically. tips.clip-studio.com
4. Advanced Styling Techniques: Realism vs. Anime
Depending on the aesthetic of your website audience, you can adapt your orange eyes drawing style in two major directions:
Stylized / Anime Orange Eyes
- Characteristics: Simplified shapes, large glowing gradients, and distinct cell-shading.
- How-To: Use thick, stylized black line art. Fill the top half of the iris with a deep burnt orange and the bottom half with a brilliant marigold yellow. Add large, geometric white catchlights (squares or star shapes) for a vibrant, expressive look. Use a soft airbrush set to Linear Dodge (Add) to make the center look like it’s emitting a warm, inner fire.
Hyper-Realistic Orange Eyes
- Characteristics: Intricate detail, visible blood vessels on the sclera, glossy reflections, and microscopic color variations.
- How-To: Layer dozens of translucent colored pencil or digital brush strokes. Incorporate tiny flecks of green or hazel into the orange iris (heterochromia elements or natural flecks often found in amber eyes). Ensure the reflection of the eyelashes is subtly mirrored inside the glossy surface of the cornea.
5. Common Mistakes to Avoid
Even experienced artists occasionally fall into traps that flatten their eye drawings. Watch out for these pitfalls:
- The “Flat Pumpkin” Effect: Using only one shade of bright orange without mixing in browns, yellows, or reds. Always use value contrast (light vs. dark).
- Missing the Upper Lid Shadow: Forgetting to darken the top of the iris, which makes the eye look flat and expressionless rather than deeply set.
- Stark White Sclera: Making the whites of the eyes pure, digital #FFFFFF white. In reality, the eyeball is a sphere in shadow; shade the corners with soft grays or purples.
- Misaligned Catchlights: Placing highlights that don’t match a logical light source direction. Keep your light source consistent across both eyes!
Conclusion
Creating a breathtaking orange eyes drawing is a rewarding journey that combines technical precision with creative color exploration. By respecting the underlying anatomy, layering rich warm tones from deep rust to bright marigold, and nailing those critical glossy highlights, you can bring any character to life with an unforgettable gaze.
Practice these steps on your next digital canvas or sketchpad, experiment with different expressions, and watch how a splash of fiery orange transforms your character art!
What style of eye drawing are you planning to tackle next? Let us know in the comments below, and share your orange eye creations!