Introduction: The Magic of Eye Drawing
There is an old saying that the eyes are the windows to the soul. In the world of art, they are also the most expressive and captivating feature you can capture on paper. Whether you are drawing a realistic portrait, a stylized comic book character, or a whimsical fantasy creature, mastering the eyes changes everything.
Many beginners feel intimidated at the thought of sketching eyes. The complex curves, the glossy reflections, and the delicate eyelashes can look overwhelming at first glance. However, once you break down the anatomy into basic geometric shapes, the process becomes remarkably straightforward. This guide is designed to walk you through cool easy drawings eyes, helping you build confidence, improve your pencil control, and create stunning results without frustration.
Understanding Eye Anatomy Simply
Before your pencil touches the paper, it helps to understand what an eye actually looks like beneath the details. An eye is not just a flat oval; it is a sphere (the eyeball) set inside a socket, covered by eyelids that wrap around that sphere like a blanket.
- The Eyeball: A spherical shape, though you only see a portion of it. The white part is called the sclera.
- The Iris and Pupil: The iris is the colored circle, and the pupil is the black center that expands and contracts.
- The Eyelids: These are muscular folds that have thickness and weight, casting a subtle shadow onto the eyeball itself.
- The Tear Duct: A small, pinkish, triangular shape located at the inner corner of the eye.
Keeping these structural layers in mind prevents your drawings from looking flat or pasted-on.
Essential Tools You Will Need
You do not need an expensive studio setup to create amazing artwork. A few basic tools are more than enough to get started:
- Pencils: A standard HB pencil for initial outlines, a 2B pencil for mid-tones, and a 4B or 6B pencil for deep, dramatic blacks.
- Paper: Smooth sketching paper or a standard drawing notebook. Smooth paper makes blending shading much easier.
- Eraser: A standard eraser for big mistakes and a kneaded eraser for lifting out highlights (like the sparkle in the eye).
- Blending Tool: A blending stump or a clean cotton swab to soften pencil strokes.
Step-by-Step Tutorial: How to Draw an Eye Easily
Let’s dive into a practical, step-by-step workflow. Grab your pencil and follow along at your own pace.
Step 1: Establish the Basic Guidelines
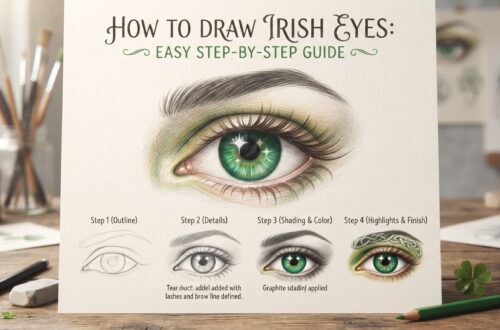
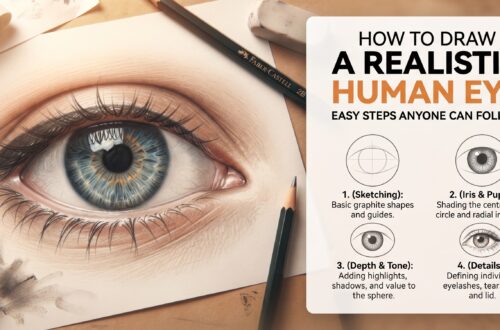
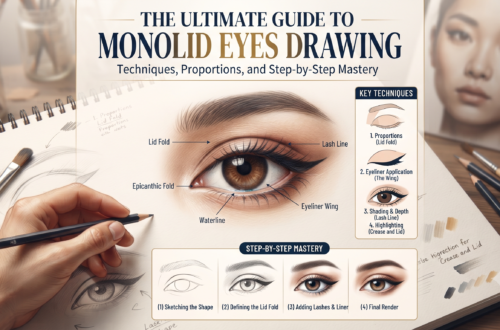
Lightly sketch a horizontal guideline across your paper. Light pressure is essential here so you can easily erase later. Draw a gentle almond shape. Make sure the inner corner (near the nose) slopes downward slightly, while the outer corner curves upward or stays level.
Step 2: Add the Iris and Pupil
Inside your almond shape, draw a large circle for the iris. Do not make it too small, or the eye will look startled; about half to two-thirds of the circle should be covered by the upper and lower eyelids. Right in the center of the iris, draw a smaller, solid black circle for the pupil.
Step 3: Map Out the Highlights
Before you shade anything, decide where your light source is coming from. If the light is coming from the top right, leave a small, clean circular or oval space untouched inside the iris and pupil. This negative space becomes the primary highlight, giving the eye its wet, glossy look.
Step 4: Layer the Shading
Shading gives the drawing its three-dimensional form.
- The Sclera: Remember that the eyeball is a sphere, so the upper eyelids cast shadows downward. Lightly shade the top edges of the white part of the eye using your HB pencil. Leave the lower half bright.
- The Iris: Shade outward from the pupil like the spokes of a wheel. Use your 2B pencil near the outer edge of the iris and around the pupil to create rich contrast, keeping the area around your highlight slightly lighter.
- The Pupil: Fill the pupil in solid black, making sure to work around your highlight spot.
Step 5: Refine Eyelids and Eyelashes
Eyelashes do not grow in a straight, stiff row like a hairbrush. They curve outward and upward on the top lid, and downward and sparser on the bottom lid.
- Thicken the upper eyelid line significantly, as this represents the shadow cast by the upper lashes and skin fold.
- Draw individual lashes sweeping outward in bundles rather than uniform single lines. Keep strokes light and quick, flicking the pencil away from the skin.
Step 6: Add Skin Folds and Finishing Touches
Draw a soft, curved line above the upper eyelid to represent the crease of the eye socket. Add a gentle shadow beneath the lower lid to give the eye depth in the face. Use your blending stump to soften any harsh pencil lines, ensuring smooth transitions between light and shadow.
Common Beginner Mistakes to Avoid
As you practice cool easy drawings eyes, watch out for these frequent pitfalls:
- Pressing Too Hard Too Soon: Heavy outlines make it difficult to erase and fix proportions. Always sketch lightly until you are happy with the layout.
- Ignoring the Gloss: Forgetting to leave a white highlight makes the eye look dry, dull, or glassy in a lifeless way.
- Symmetrical Perfection: Real human eyes are organic and slightly asymmetrical. Do not stress over making both sides of an eye exact mirror images; natural variations look much better.
- Drawing Floating Eyelashes: Eyelashes sprout from the thickness of the eyelid, not from thin air right outside the outline. Always make sure your eyelid line has visible width.
Creative Variations to Try
Once you master a standard, realistic eye, you can experiment with fun artistic styles:
- Anime and Manga Eyes: Exaggerate the size of the iris, add massive glowing highlights, and use bold, clean outlines for a dynamic, energetic look.
- Expressive Eyes: Change the shape of the eyebrows and eyelids to convey emotions like anger, sadness, surprise, or joy. A lowered brow instantly turns a neutral eye into an intense glare.
- Fantasy Elements: Add animal slit pupils, galaxy patterns inside the iris, or unusual eye colors like vibrant purple and gold.
Conclusion
Mastering eye sketches is a rewarding journey that relies on patience, observation, and regular practice. By breaking down complex structures into basic shapes, managing your light sources, and adding thoughtful highlights, you can produce incredible artwork in no time.
Keep your strokes light, experiment with different styles, and most importantly, have fun with the creative process. Every sketch you complete brings you one step closer to artistic confidence!