









The human eye is one of the most expressive features on the face, making it a favorite subject for artists of all levels. Whether you are aiming for hyper-realistic portraits or stylized character designs, mastering the anatomy and structure of the eye is the key to bringing your drawings to life.
If you are struggling with eye drawings that look “flat” or disproportionate, you aren’t alone. Many artists jump straight into the details—like eyelashes and iris patterns—before establishing the underlying form. In this guide, we will break down the process into actionable steps to help you improve your technique and create captivating eye art.
1. Understand the Foundation: Anatomy and Structure
Before putting pencil to paper, it is essential to remember that the eye is not a flat shape; it is a spherical object housed within a bony socket.
Vitruvian Fine Art Studio
The Bony Socket
The eye sits within the orbit, formed by the frontal bone (brow ridge), the maxilla (inner edge), and the zygomatic bone (cheekbone). When sketching, visualize these structures. They provide the “context” for the eye and prevent the common mistake of placing the eye arbitrarily on the face.
Vitruvian Fine Art Studio
The Spherical Reality
Because the eye is a ball, the eyelids wrap around it. Think of the eyelid trajectories like lines of latitude on a globe. They curve and bend according to the eyeball’s volume. If you ignore this, your drawings will appear two-dimensional and lifeless.
Vitruvian Fine Art Studio
2. Step-by-Step Approach to a Realistic Eye
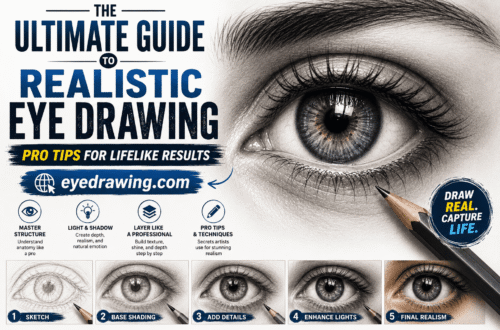
To create a professional-grade eye drawing, follow this structured workflow:
Step 1: The Initial Sketch
Start with a light hand. Outline the basic shape of the eye and the surrounding socket. Use light, removable strokes to map out where the iris, pupil, and eyelids will sit.
Luiza Creates+ 1
- Pro Tip: Look for the “high point” or apex of the upper eyelid. It usually sits slightly toward the inner corner. Vitruvian Fine Art Studio
Step 2: Establish the “Cake” Before the “Icing”
Avoid the temptation to draw individual lashes immediately. Instead, establish the value structure. Identify where your light source is coming from and shade the dark areas, mid-tones, and highlights accordingly. Remember that the sclera (the white of the eye) is rarely pure white; it is a sphere and will have shadows and gradations.
The Drawing Source+ 2
Step 3: Defining the Iris and Pupil
The iris is a complex, radiating structure. Instead of drawing a solid circle, add depth with darker lines near the edges and subtle, shorter strokes near the pupil. Always define the pupil’s placement early, and don’t forget the highlight—the “wetness” of the eye is what makes it pop.
Blog of Barbara Baumann Illustration
Step 4: Adding Details
Once the form and values are set, it is time for the “icing”—eyelashes, eyebrow hair, and skin texture. When drawing lashes, avoid perfect symmetry. Vary the length, curve, and spacing to create a natural, organic look.
Blog of Barbara Baumann Illustration
3. Common Mistakes to Avoid
Even experienced artists can fall into these traps. Keep this checklist handy while you work:
- Forgetting the Tear Duct: Artists often miss the small, complex forms in the inner corner of the eye. The Drawing Source
- Too Much White in the Sclera: As mentioned, the white of the eye is a shadow-filled curve. Leaving it pure white makes the eye look flat. The Drawing Source
- Symmetrical Eyelashes: Nature is rarely perfectly symmetrical. Vary your strokes to avoid a “doll-like” or static appearance.
- Skipping the Value Check: If you aren’t sure if your shading is correct, squint at your reference photo. This blurs the details and helps you see the light and dark shapes more clearly. The Drawing Source
4. Exercises to Level Up Your Skills
Improvement comes from deliberate practice. Try these exercises to sharpen your eye-drawing abilities:
- The Mirror Study: Spend 15 minutes sketching your own eye in a mirror. This forces you to observe depth and volume in a way that a flat photograph cannot. Binge Drawing
- Plaster Casts: If you have access to a reference image of a statue (like the Statue of David), draw the eye from the cast. The lack of skin texture helps you focus entirely on the planes and structure of the socket. Binge Drawing
- Targeting and Angles: Practice drawing random points or angles on a page and accurately reproducing their distance and relationship to one another. This trains your “sighting” ability, which is vital for portraiture.
Conclusion
Drawing eyes is a journey of observation. By shifting your focus from “drawing lines” to “building structures,” you will notice an immediate improvement in the realism and expression of your work. Remember to be patient with yourself—every master artist began with a simple, shaky sketch. Keep practicing, keep observing, and most importantly, keep enjoying the process of creation.
Are you currently working on a specific eye drawing, or are you looking for tips on how to draw eyes from a particular angle, such as the side or three-quarter profile?



One comment on “Master the Art of Eye Drawings: A Comprehensive Guide for Artists”