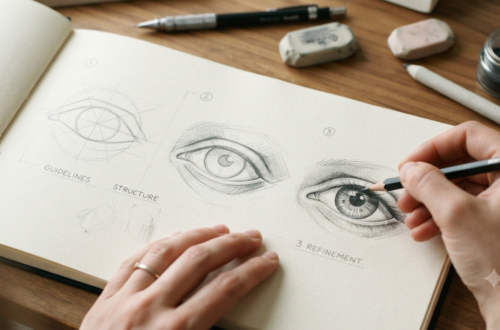
When you sit down to sketch an eye, your mind naturally focuses on the expression, the depth of the pupil, or the wet gleam of the iris. However, the secret behind a truly captivating eye sketch doesn’t lie in complex theory—it lies at the very tip of your pencil.
In the art community, mastering how your pencil tip interacts with the paper is often called the Tip Draw method. By varying how you use, angle, and apply pressure to the point of your drawing instrument, you can completely transform a flat, cartoonish eye into a hyper-realistic masterpiece.
If you want your artwork on Eyes Drawings to truly stand out, you need to understand the different types of tip-drawing mechanics. Let’s break down the 7 essential pencil tip techniques that will take your eye art from amateur to breathtaking.
What Exactly is the “Tip Draw” Method?
At its core, tip-drawing refers to using the absolute point of a graphite pencil, fineliner, or digital stylus to create precise, controlled marks. This is distinct from “side-drawing,” where an artist uses the flat flank of an unsharpened pencil core to lay down wide, soft fields of shadow.
When drawing human eyes, the tip is your ultimate tool. The structure of an eye requires incredibly fine spatial accuracy—from the microscopic ridges of the iris to the razor-thin shadows of the tear duct. Mastering the point gives you complete control over line weight, texture, and contrast.
7 Types of Tip Drawing Techniques for Eye Art
To build a realistic eye, you cannot rely on just one type of line. You must treat your pencil tip like a multi-tool. Here are the seven types of linework every eye artist must master:
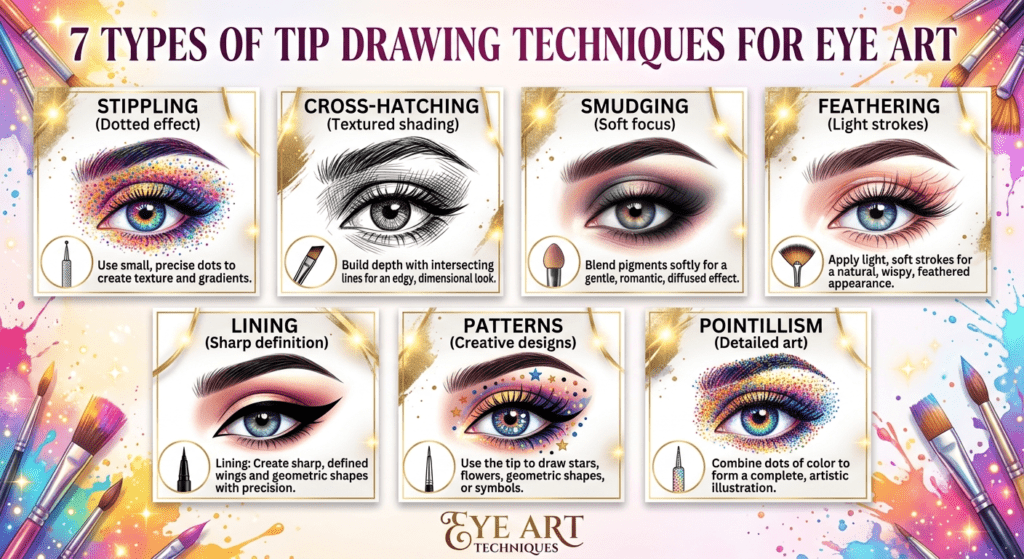
1. The Ultra-Fine Point (For Iris Details)
- The Technique: Keeping your pencil exceptionally sharp (using a sandpaper block or precision sharpener), hold the pencil at a steep 80 to 90-degree angle to the paper. Use minimal pressure.
- How to Apply it to Eyes: The human iris is packed with tiny muscular fibers called trabeculae. By using an ultra-fine tip-draw stroke, you can radiate fine lines outward from the pupil to replicate these natural textures without making the iris look muddy.
2. Tapered Stippling (For the Tear Duct & Wet Textures)
- The Technique: Gently tapping the direct tip of the pencil or a fine-tip ink pen onto the paper to create clusters of dots.
- How to Apply it to Eyes: The caruncle (the inner pink corner of the eye) is inherently wet and reflects tiny dots of light. Heavy shading makes it look dark and hollow. Instead, light tip-stippling creates the illusion of a soft, moist tissue texture.
3. Flick & Release (For Hyper-Realistic Eyelashes)
- The Technique: Place the pencil tip firmly at the root point, then swiftly flick your wrist outward, lifting the tip off the paper mid-stroke. This creates a line that is thick at the base and perfectly tapered at the end.
- How to Apply it to Eyes: Eyelashes are never uniform blocks of color. They are individual hairs that taper to a fine point. Using the flick-and-release tip method prevents lashes from looking like heavy, unnatural spider legs.
4. Continuous Contour Mapping (For the Initial Eye Shape)
- The Technique: Moving the pencil tip lightly and continuously across the paper without lifting it, mapping out the raw boundaries of your subject.
- How to Apply it to Eyes: Before adding shadows, use a hard, light pencil (like a 2H) to softly map out the almond curvature of the eyelids. This establishes your proportions securely before you commit to darker values.
5. Micro-Hatching (For Eyelid Folds)
- The Technique: Drawing ultra-thin, closely spaced parallel lines using a medium-grade pencil tip (such as an HB).
- How to Apply it to Eyes: The skin around the upper and lower eyelids is incredibly thin and folds easily. Instead of drawing a solid, harsh line for the eyelid crease—which flattens the drawing—use micro-hatching to build up a soft, realistic fold that implies depth.
6. Cross-Hatching for Deep Shadows (For the Sclera Shadows)
- The Technique: Layering parallel lines at intersecting angles using the tip to create dense, clean dark values.
- How to Apply it to Eyes: The eyeball (sclera) is a sphere, meaning the corners cast heavy shadows under the eyelids. Never leave the “white” of the eye completely white. Use delicate cross-hatching in the deep corners to give the eyeball its round, 3D volume.
7. Pressure-Controlled Accents (For the Pupil & Rim)
- The Technique: Pressing down firmly with a soft graphite pencil tip (like a 4B or 6B) to release maximum carbon onto the page, creating rich, velvety blacks.
- How to Apply it to Eyes: The pupil must look like a deep, bottomless void. Use heavy tip pressure to make the pupil as dark as possible, creating a stark contrast against the white highlights of the eye.
Pro-Tips for Achieving “Tip Draw” Perfection
If you want your website visitors to keep coming back for your tutorials, sharing actionable troubleshooting advice is key. Here are the golden rules of drawing with your pencil tip:
The Overlap Rule: Avoid reaching for the eraser the moment a line looks crooked. Instead, lightly layer multiple refined tip-strokes over the original line until you discover the true shape. This technique keeps your paper smooth and adds a dynamic, professional sketch style to your eye art.
Crafty By Numbers
- Pivot from the Shoulder: When mapping out large, sweeping orbital bone structures, don’t just use your wrist. Move your entire arm from the shoulder to get fluid, confident lines. Save the wrist for small, detailed eyelash flicks. Crafty By Numbers
- Squint to Verify Values: Periodically step back from your drawing and squint your eyes. This blurs the individual tip lines, allowing you to instantly see if your dark and light tones are balanced correctly. NuArtPlanet
Summary: Elevating Your Eye Art Website
By teaching your audience how to properly implement the Tip Draw method, you shift their focus from “trying to make things look real” to understanding the actual mechanics of mark-making. Incorporating these seven distinct line types will ensure that every eye sketch you publish on Eyes Drawings features the contrast, depth, and anatomical precision required to captivate your readers. Grab your pencils, sharpen those tips, and start experimenting!