









Learning how to draw a realistic human eye can feel incredibly intimidating when you are first starting out. You look at hyper-realistic artwork online and wonder how it is even possible to capture all those intricate reflections, wet textures, and perfectly fine eyelashes with just a simple graphite pencil.
The good news? Breaking the process down into manageable parts makes it simple. Welcome to Eyes Drawings, your go-to hub for accessible art education. In this comprehensive tutorial, we are going to dive deep into an easy eye drawing step by step method that strips away the confusion and leaves you with a stunning, lifelike sketch.
Whether you are looking to populate your sketchbook or just trying out a few new easy drawings this weekend, this guide will provide the exact roadmap you need to build confidence and hone your skills.
1. Gathering Your Art Supplies
Before your pencil even touches the paper, you need to make sure you have the right tools. While you can technically sketch with a standard school pencil, having a small variety of graphite options will dramatically change the quality of your values (the lightness or darkness of a color or tone).
- A Hard Pencil (2H or HB): Ideal for drawing light outline marks that you can easily erase later if you make a mistake.
- A Soft Pencil (4B or 6B): Crucial for deep, rich dark tones in the pupil and heavy shadows.
- A Kneaded Eraser: Unlike regular pink erasers, a kneaded eraser can be molded into tiny points to lift away graphite and create sharp highlights.
- A Blending Stump (Tortillon): Essential for smoothing out harsh pencil strokes to achieve realistic skin texture and iris transitions.
2. Laying the Foundation: The Basic Geometry of the Eye
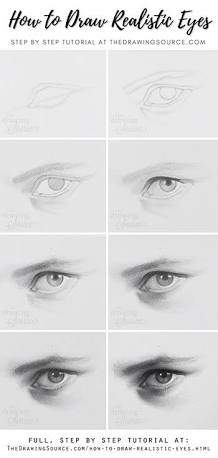
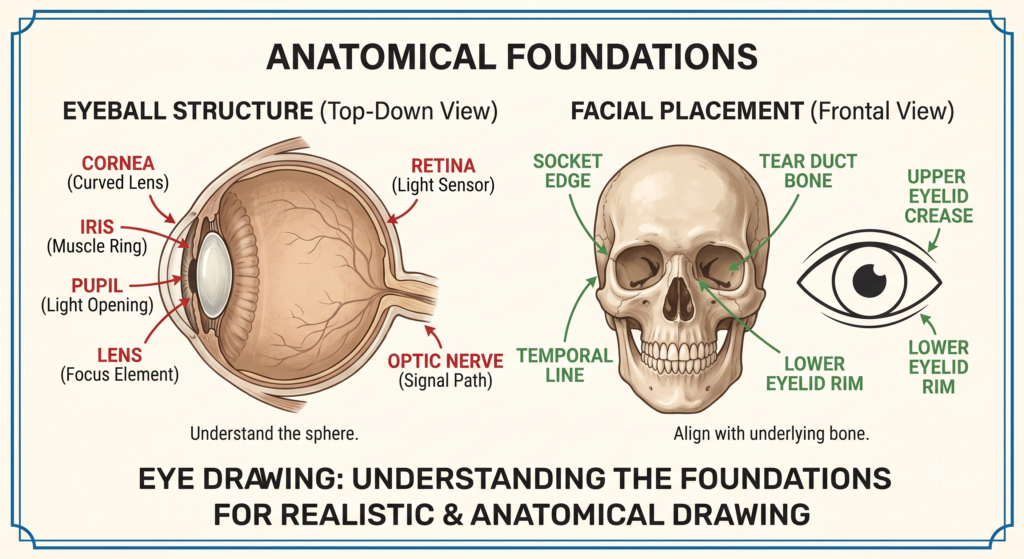
The biggest mistake beginners make is drawing an eye like a symmetrical football. In reality, the human eye is asymmetrical and curves gently around a sphere (the eyeball).
Drawing the Outline
Start by lightly using your HB pencil to draw a simple almond shape. Notice how the top curve rises a bit higher near the inside corner (the tear duct), while the bottom curve drops lower toward the outside edge. Keep your pressure light so these structural guidelines do not indent the paper permanent fashion.
Next, add the inner circle for the iris (the colored part of the eye). Keep in mind that when a person is looking directly at you, the top and bottom edges of the iris are usually slightly covered by the eyelids. If you draw the entire circle floating right in the middle, your subject will look startled or shocked!
3. Mapping Out the Pupil and Highlights
Now that you have your outer boundaries established, it is time to establish the focal point of the gaze: the pupil and the light reflections.
- Locate the Center: Place a smaller, perfect circle right in the dead center of your iris. This is the pupil.
- Protect Your Highlights: Before you shade anything in, use your hard pencil to draw one or two small boxes or circles overlapping the pupil and iris. These represent your catchlights—the reflections of light sources like windows or lamps.
- Fill the Pupil: Take your softest pencil (4B or 6B) and color the pupil in completely dark, leaving the catchlight areas completely blank, bright white paper. This stark contrast immediately breathes life into your sketch.
4. Shading the Iris and Creating Depth
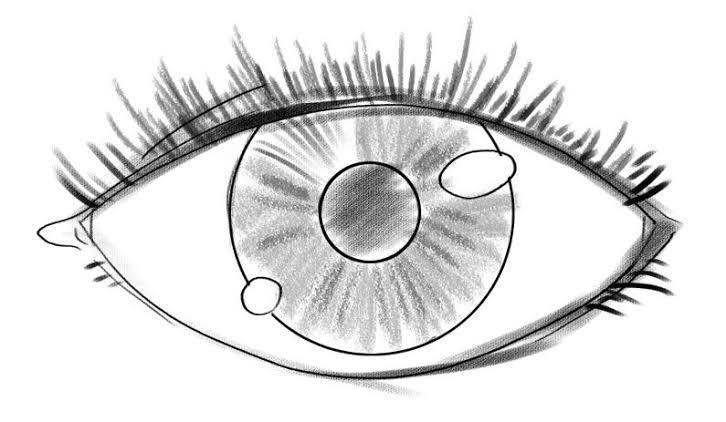
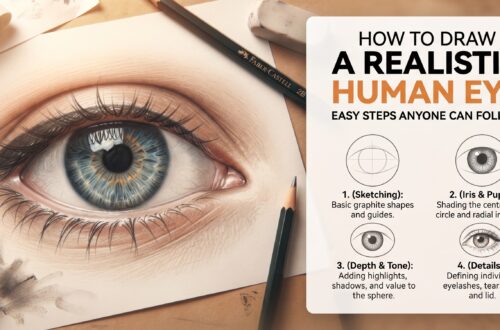
The iris is where the true magic happens. Instead of just shading it with a flat grey tone, you want to mimic the natural, fibrous texture of a real eye.
Adding Linear Details
As shown in the structural diagram above, the texture of the iris radiates outward like the spokes on a bicycle wheel.
- Take your sharpened HB pencil and draw fast, thin lines shooting outward from the edge of the pupil toward the outer rim of the iris.
- Repeat the process moving backward—draw short strokes from the outer rim of the iris pointing inward toward the center.
- Leave room for light: Keep some areas between the lines lighter to give the illusion of depth and glossiness.
Pro Tip: Use your blending stump to softly glaze over these lines. This tones down harsh graphite marks and creates a beautiful, natural base layer before you go back in with a darker pencil to add crisp contrast.
5. Don’t Forget the Eyeball is a Sphere
One of the most common mistakes in easy drawings is leaving the sclera (the white of the eye) completely plain white. Because the eyeball is a round ball nestled back inside a socket, it naturally catches shadows at the far left and right edges.
Using a light touch with your H or HB pencil, apply a soft gradient of shade to the outer corners of the white area. Blend it smoothly inward toward the center using your blending tool. This simple shift from dark edge to bright center instantly transforms a flat, 2D shape into a round, 3D object.
6. Framing the Structure: Eyelids and the Tear Duct
An eye does not float in space; it is framed by layers of skin.
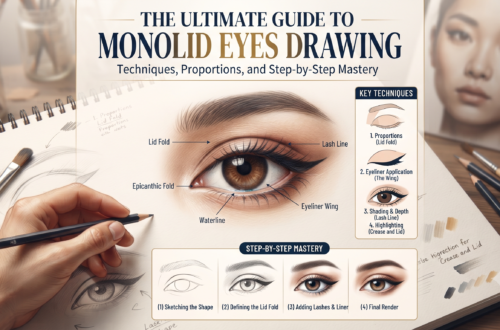
- The Upper Lid Crease: Draw a parallel curved line just above the top eyelid. The distance of this line varies depending on the ethnicity and unique facial shape of the person you are drawing, but adding it is essential for showing the fold of the skin.
- The Lower Lid Rim: Look closely at a mirror. Your bottom eyelashes do not grow right against your eyeball. There is a small, wet ledge of skin called the lower waterline. Draw a thin, secondary line just underneath the bottom eye curve to represent this shelf. Leave it unshaded to show that it is reflecting light.
- The Tear Duct (Caruncle): Shape the inner corner into a small, soft triangle. Shade it very lightly with small circular motions to give it a soft, fleshy appearance.
7. How to Draw Realistic Eyelashes
Drawing eyelashes is often the step where artists accidentally ruin an otherwise great sketch. Beginners tend to draw them like stiff, straight sticks pointing straight up into the air. In reality, eyelashes curve outward and clump together in small groups.
Incorrect Style:  |||||||||| (Stiff, straight lines)
Correct Style:    ///////    (Curved, sweeping strokes that flick at the tips)
The Quick Flick Technique
To get the perfect lash look, start your pencil at the root on the eyelid margin, press down firmly, and swiftly sweep your hand outward, lifting the pencil off the paper at the end of the stroke. This creates a line that is thick at the base and tapers off into a beautiful, sharp point at the end.
- Top Lashes: These swoop downward slightly before curling dramatically upward toward the eyebrow.
- Bottom Lashes: These are much shorter, thinner, and sparse. Grow them from the bottom edge of the lower waterline, not the top edge.
- Clumping: Group two or three lashes so they cross over or meet at the tips. This looks significantly more organic than perfectly spaced, uniform lines.
8. Final Touches and Boosting Value Contrast
Step back from your drawing table and take a long look at your work from a few feet away. Does the drawing pop, or does it look a bit pale and washed out?
To achieve a high level of dimension, you need strong contrast. Take your softest 6B pencil one last time and darken the very center of the pupil, the shadow directly underneath the top eyelid, and the outer border of the iris. Next, use the sharp tip of your molded kneaded eraser to clean up the clean catchlight boxes inside the pupil, lifting away any accidental smudges.
Summary Reference Table
| Eye Component | Best Pencil Choice | Shading Strategy | Common Mistake to Avoid |
| Pupil | 6B (Very Soft) | Solid dark fill, no gradients | Forgetting to leave the white highlight crisp |
| Iris | HB & 2B | Radiating spokes like a bicycle wheel | Shading with flat, solid circular blocks |
| Sclera (White) | 2H or HB | Soft blending on the far left and right edges | Leaving it completely bright white |
| Eyelashes | 4B (Sharp) | Quick, curved flicking motions | Drawing straight, rigid vertical lines |
Keep Practicing Your Craft!
Learning how to create an easy eye drawing step by step is all about patience and muscle memory. Do not be discouraged if your first attempt isn’t flawless. Every single drawing you finish teaches your hands and eyes how to look closer at shapes, values, and fine lines. Keep filling those pages, explore more tutorials here on Eyes Drawings, and watch your skills skyrocket!


One comment on “How to Create an Easy Eye Drawing Step by Step: A Beginner’s Guide”