

Capturing the Soul: How to Draw Semi-Realistic Eyes
The eyes are often called the windows to the soul, and in the world of portraiture, they are undoubtedly the most critical focal point. Whether you are creating fan art, original character designs, or realistic portraits, learning how to draw semi-realistic eyes is a foundational skill that will instantly elevate your work.
Semi-realism is the perfect middle ground—it retains the structural accuracy of a real eye while allowing for stylized, expressive features that bring your art to life. In this guide, we will break down the anatomy and shading process into manageable, actionable steps.
Understanding Eye Anatomy: The Foundation
Before putting pencil to paper, it is essential to understand that an eye is not just a flat oval. It is a sphere sitting inside a bony socket. When drawing eyes, you must account for the curves and the subtle depth of the surrounding area.
Key components to identify:
- The Eyeball (Globe): A sphere partially hidden by the eyelids.
- The Upper Lid: Usually covers the top part of the iris.
- The Lower Lid: Often more subtle and sits slightly “behind” the upper lid.
- The Caruncle: The small, pinkish corner of the eye near the nose.
- The Iris and Pupil: The center of focus.
- The Lash Line: The thickness of the eyelid where lashes emerge.
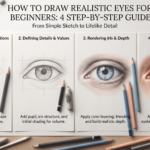
The Step-by-Step Process
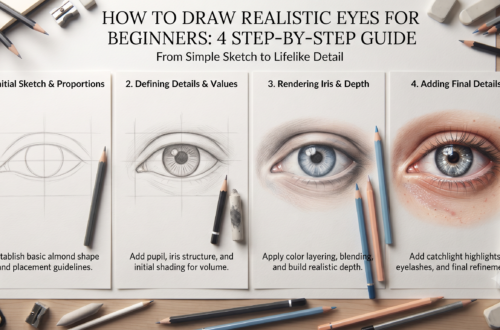
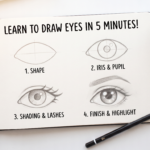
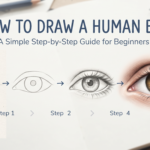
Step 1: Establishing the Shape
Start with a light, horizontal construction line. Instead of a perfect oval, draw a shape that resembles an almond with a slight dip for the upper lid.
- Pro Tip: Remember that the upper lid should be slightly more arched than the lower lid. The peak of the upper arch should be just slightly off-center toward the inner corner.
Step 2: Placing the Iris and Pupil
Draw a circle for the iris inside the eye shape. Note that the iris should be partially obscured by the upper eyelid—if you draw the entire circle, the eye will look startled or “wide-eyed.”
- Place the pupil perfectly in the center of the iris. Keep it circular, but don’t worry about perfect symmetry just yet.
Step 3: Defining the Folds and Depth
Draw the crease of the eyelid above the lash line. This is a crucial step for semi-realism; it adds dimension and prevents the eye from looking flat. Follow the curve of the upper eyelid, starting from the inner corner and sweeping out toward the outer corner.
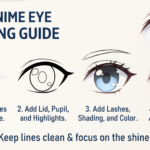
Step 4: The Magic of Highlights
Highlights are what give the eye its “wet,” lifelike appearance.
- Place a large, white circular or square shape on the iris, overlapping the pupil. This represents light reflection.
- Add a secondary, smaller highlight on the opposite side of the iris to create a sense of volume.
- Important: Keep these areas completely white. The contrast between deep blacks and bright white highlights is what creates the “pop” factor in semi-realistic art.
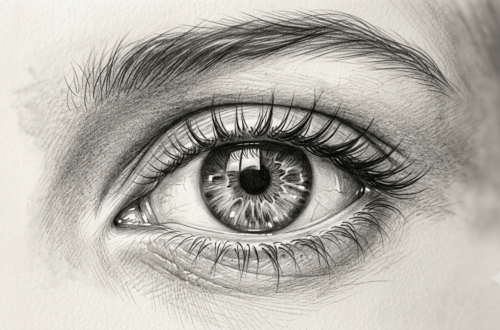
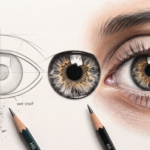
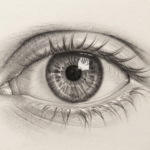
Step 5: Shading the Globe
The eyeball is a sphere, so it needs shading!
- Lightly shade the top portion of the iris, as it is often cast in shadow by the upper eyelid.
- Add a soft, subtle gradient on the white part of the eye (the sclera) near the corners. Use a blending stump or a soft tissue to keep the shading smooth. Avoid harsh lines here.
Step 6: Lashes and Texture
Lashes do not grow in a straight, uniform line. They grow in clusters and have a natural curve.
- Start the lashes from the lash line, not from the skin above it.
- Draw them with a “flicking” motion, curving them upward and outward.
- Keep the lashes denser toward the outer corner of the eye. For the bottom lashes, make them shorter, sparser, and less curved.
Pro Tips for the “Semi-Realistic” Look
The “semi” part of semi-realism allows for artistic license. Use these tips to refine your style:
- Vary Your Line Weight: Don’t make every line the same thickness. Use thicker, darker lines for the upper lash line (to mimic shadow) and thinner, lighter lines for the lower lash line.
- Don’t Outline Everything: In nature, there are no black outlines. Use shading to define shapes rather than drawing a hard border around the iris or the corner of the eye.
- The Waterline: Drawing a thin, light-colored line along the bottom edge of the lower eyelid (the waterline) adds a layer of realism that most beginners skip.
- Mind the Eyebrows: The eyebrows provide the emotion. A subtle arch can change the entire mood of the portrait from curious to angry or sad.
Tools for Success
You don’t need expensive supplies to create professional-looking work.
- Pencils: A standard HB for sketching, 2B for base shading, and a 4B or 6B for the deep blacks of the pupil.
- Blending Stump (Tortillon): Essential for smooth transitions in the sclera and iris.
- Kneaded Eraser: Use this to “lift” highlights and clean up edges. It is much more versatile than a standard pink eraser.
Troubleshooting Common Mistakes
- “My eye looks like a fish eye!” – This usually happens when the iris is perfectly centered and showing entirely. Remember, the lids should always cover the top and sometimes the bottom of the iris.
- “The eye looks flat.” – You likely haven’t shaded the lids. Remember that the eyelid has thickness (the waterline), and the skin above the eye is a fold, which creates a shadow.
- “The eyes don’t match.” – If you are drawing two eyes, focus on drawing them simultaneously. Work on the shape of the left, then the right. Switch back and forth to keep them balanced.
Developing Your Personal Style
Once you master the technical steps of how to draw semi-realistic eyes, start experimenting. Change the shape of the iris, exaggerate the lashes, or adjust the highlights to create different moods. Semi-realism is not about being a human camera; it’s about capturing the essence of the subject in a way that feels intentional and artistic.
Consistency is your best teacher. If you can dedicate just 10 minutes a day to sketching eyes from different angles—side view, three-quarter view, and front view—you will see a massive improvement in your portraiture skills within just a few weeks.
Remember, every great artist started exactly where you are. Keep observing real-life references, keep practicing your shading, and most importantly, enjoy the process of bringing your characters to life.
Do you find it harder to draw the eyes from a front-facing perspective or from a side profile, and would you like a guide on how to adjust these techniques for different viewing angles?