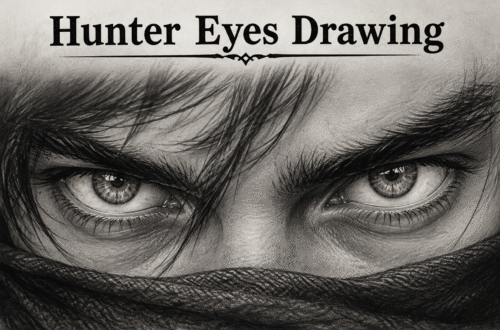
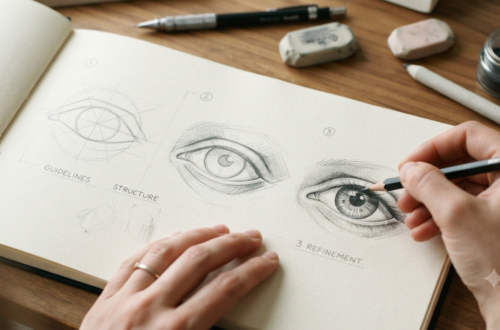
Many people believe that drawing is an innate, magical talent—that you are either born with a pencil-wielding hand or you are not. This is a myth. Drawing is a learned skill rooted in two primary actions: training your eyes to see things as they actually are, and training your hand to translate that data onto a surface.
Whether your goal is to sketch hyper-realistic portraits, design comic books, or simply capture the world in a travel journal, expanding your knowledge across different types of drawing styles will accelerate your growth.
This ultimate guide breaks down foundational drawing tips for beginners, explores the core styles of visual art, and provides a systematic framework to take your sketches from flat to three-dimensional.
1. Essential Gear: Choosing Your Mediums
Before your pencil hits the paper, understanding your tools is vital. Different mediums offer contrasting textures, values, and expressive qualities.
- Graphite Pencils: These are categorized by hardness. H pencils have harder lead and create light, crisp lines (excellent for initial layouts). B pencils contain softer lead, producing dark, rich smudges ideal for shading. Beginners should start with a basic $2B$, $4B$, and $6B$ set.
- Charcoal: Available in vine (soft, easily erasable) and compressed (deep black, intensely rich) formats. Charcoal is perfect for expressive gestures and high-contrast value studies.
- Ink and Fine Liners: Perfect for precision, cross-hatching, and illustrational styles. Ink forces you to be deliberate since it cannot be erased.
2. Seven Essential Types of Drawing Styles
To find your unique artistic voice, you must explore different genres. Each style requires a different cognitive approach to the subject matter.
A. Realism and Hyperrealism
Realism focuses on rendering a subject as accurately as possible, capturing light, shadow, texture, and correct proportions. Hyperrealism takes this a step further, mimicking high-resolution photography.
- Pro Tip: Stop drawing what you think an object looks like (the abstract symbol in your mind) and draw exactly what you see (the shapes of light and shadow).
B. Line Drawing (Contour Art)
Line drawing relies solely on clean, definitive lines without any shading or blending.
- Blind Contour Drawing: A classic exercise where you look exclusively at your subject—never down at your paper—while drawing its outline in one continuous line. This builds exceptional hand-eye coordination.
C. Gesture Drawing
Gesture drawings are timed sketches—often lasting only 30 to 90 seconds—that capture the fluid movement, energy, and weight distribution of a human form or object. It ignores detail in favor of raw rhythm.
D. Cartooning and Caricature
This style relies on simplification and exaggeration. Cartooning strips away complex textures to focus on bold shapes, distinct lines, and expressive emotional traits.
E. Perspective and Architectural Drawing
Rooted in spatial mathematics, architectural drawing uses one-point, two-point, or three-point perspective grids to create the illusion of deep three-dimensional space on a flat sheet of paper.
F. Abstract Drawing
Abstract art breaks away from literal representations. Instead of drawing a real vase, you might draw the emotional energy or geometric essence of that vase using non-representational strokes, shapes, and patterns.
G. Stippling and Pointillism
This precise technique uses varying densities of tiny dots to build up form, depth, and shadow. It requires immense patience but yields breathtaking depth and texture.
3. Four Core Shading Techniques to Create Depth
Shading is what transforms a flat, 2D outline into a living 3D form. By varying how you apply pressure and layer lines, you can create the illusion of light wrapping around an object.
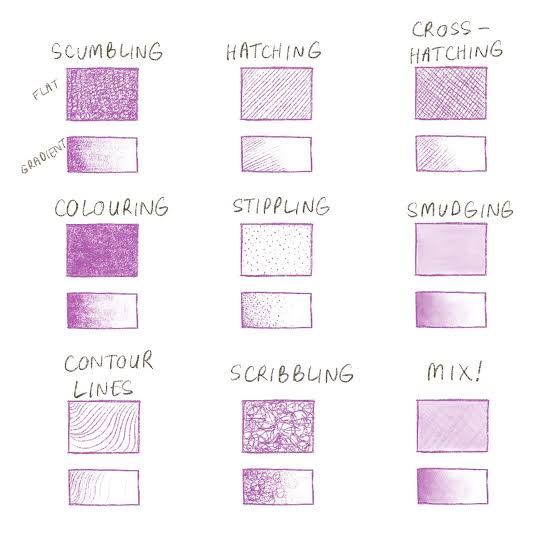
Hatching
Hatching involves drawing parallel, non-overlapping lines. The closer together the lines are placed, the darker the shadow appears.
Cross-Hatching
Cross-hatching builds upon regular hatching by overlaying a second set of parallel lines at an angle. This creates dense cross-sections that are incredibly effective for deep shadows and fabric textures.
Scumbling (Scribbling)
Scumbling involves drawing loose, controlled, looping circular marks over an area. It is a fantastic technique for rendering chaotic organic textures like tree foliage, wool fabrics, or rough skin.
Blending (Smudging)
Blending uses a tortillon (blending stump) or a soft cloth to smooth out graphite or charcoal markings. This produces seamless gradients that mimic smooth plastic, polished metals, or soft human skin.
4. The Anatomy of Light and Shadow
To shade an object realistically, you must understand how light interacts with a sphere or form. Every realistically shaded object contains five distinct value zones:
      [ Light Source ]
            \
             \
   (  ○ Light Highlight  )
  (    Soft Midtones      )
 (   Core Shadow Edge      )
  (  Reflected Light Zone )
   (====================)  <- Surface Base
       [ Cast Shadow ]
- The Highlight: The bright point where the light directly strikes the surface. Leave this area bare paper white.
- Midtones (Halftones): The true, natural color value of the object as it curves gently away from the light.
- Core Shadow: The absolute darkest area on the object itself where the light can no longer physically reach.
- Reflected Light: A subtle, light value on the bottom edge of your object caused by light bouncing back up from the table or floor surface. Never skip this! It separates your object from its shadow.
- Cast Shadow: The dark shape thrown onto the ground plane beneath the object. The shadow is darkest right where the object touches the ground (occlusion shadow) and grows softer further away.
5. Daily Exercises to Improve Fast
Consistency beats raw hours. Doing these three structured exercises for just 15 minutes a day will yield massive improvements in your muscle memory within weeks:
1.The Flat-to-Gradient Ribbon:5 Minutes.
Draw a long rectangular box and partition it into 5 squares. Fill square 1 with pitch-black pencil pressure. Leave square 5 completely white. Now, smoothly transition the middle boxes from dark gray to light gray, training your hand to master subtle pencil pressure control.
2.Deconstruct Objects into 3D Shapes:5 Minutes.
Look around your room. Do not see a coffee mug; see a cylinder. Do not see an apple; see a sphere. Sketch these basic geometric structures first before adding any defining surface details.
3.The Continuous Line Portrait:5 Minutes.
Set a timer for 3 minutes. Sketch a friend, a pet, or an object without lifting your pencil off the paper even once. This frees your mind from perfectionism and builds hand fluidity.
6. Overcoming the Mind’s Optical Illusions
The biggest hurdle for beginner artists is not physical coordination; it is cognitive bias. Our brains process symbols rather than pure reality. When you look at an eye, your brain screams, “Draw an almond shape with a circle inside!”
To bypass this mental trap and unlock true observational accuracy, try drawing your reference photo upside down.
By turning the image upside down, your analytical brain can no longer quickly categorize the features as an “eye,” “nose,” or “mouth.” Instead, you are forced to view the image as abstract lines, intersecting angles, and light values. When you flip the final piece right-side up, you will be amazed at how much more accurate your proportions are.
Summary Checklist for Emerging Artists
- Vary your pencils: Use H hard leads for layouts, B soft leads for dark shadows.
- Identify the light source: Mark it with a tiny ‘X’ off-canvas to keep your shading directions consistent.
- Look up more than down: Spend 60% of your time analyzing your subject and only 40% looking at your drawing pad.
- Embrace mistakes: Erasing over-and-over degrades the paper fibers. If a line is wrong, leave it, adjust next to it, and keep moving forward.