









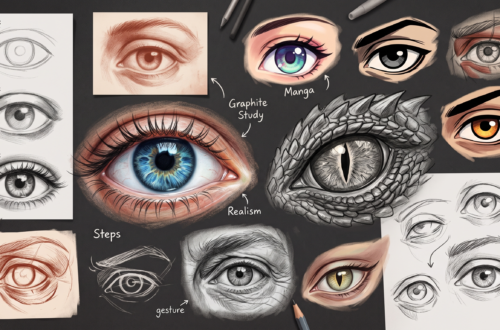
The human eye is often called the “window to the soul,” but for artists, it is also one of the most challenging and rewarding subjects to master. Whether you are aiming for hyper-realism or stylized character design, understanding the anatomy and the interplay of light and shadow is crucial.
In this guide, we will break down the process of drawing a realistic eye into manageable, actionable steps. Perfect for your gallery collection, these techniques will help you capture depth, emotion, and life in your portraiture.
1. Anatomy: The Foundation
Before putting pencil to paper, understand that an eye is not a flat shape. It is a sphere (the eyeball) set into a bony socket (the orbital cavity).
- The Sclera: The white part of the eye. It is never pure white; it has subtle shadows and gradients.
- The Iris: The colored part, which acts like a camera aperture.
- The Pupil: The black center that expands and contracts.
- The Eyelids: These wrap around the eyeball. They have thickness, which is a detail many beginners miss.
2. Step-by-Step Drawing Guide
Phase 1: The Outline
Image Suggestion: A light, construction-line sketch showing the almond-shaped base and the circle of the iris.
- Map the Shape: Draw a gentle, tilted almond shape. Remember that the top eyelid is usually more curved, while the bottom is flatter.
- Define the Iris: Draw a circle inside the almond. Don’t make it a perfect circle; part of it will be hidden by the upper eyelid.
- Add the Pupil: Place a smaller circle in the center of the iris.
- Establish Thickness: Draw a second line parallel to the top and bottom eyelids to represent the skin’s thickness.
Phase 2: Shading the Globe
Image Suggestion: A drawing showing the spherical shading of the sclera with light grey tones.
- Apply Mid-tones: The sclera is curved. Use a light HB pencil to add soft shading toward the corners (the tear duct and the outer edge) to give it a 3D feel.
- The Tear Duct: This area is complex. It looks like a small, fleshy triangle. Keep it shaded with slightly pinkish or warm grey tones.
Phase 3: The Intricacy of the Iris
Image Suggestion: A close-up of an iris with radial lines and a highlighted pupil.
- Radial Lines: From the pupil, draw thin, radiating lines toward the outer edge of the iris. They shouldn’t be perfectly uniform.
- Highlight: Leave a small white circle (or several) inside the pupil and iris. This is your light reflection—it is what makes the eye look “wet” and alive.
- Depth: Darken the edge of the iris and the area directly under the upper eyelid, as this is where the shadow of the lid falls.
Phase 4: Lashes and Texture
Image Suggestion: Final render showing fluid, curved eyelashes that taper at the ends.
- Lash Placement: Eyelashes grow from the outer edge of the eyelid thickness. They are not straight sticks; they are curved and irregular.
- Vary the Length: Mix short and long lashes. Make them “clump” together slightly rather than spacing them like a picket fence.
- The Crease: Draw the fold above the upper eyelid. This creates the weight and expression of the eye.
3. Pro Tips for Your Gallery
- Reflected Light: Never make the shadow of the eyeball completely black. Add a hint of reflected light on the bottom side of the iris to create volume.
- The “Wet” Look: Keep the waterline (the inner rim of the lower lid) clean and bright. This is a crucial highlight that adds instant realism.
- Pencil Choice: Use a range of pencils. Start with a 2H for your initial structure and move to a 4B or 6B for the deep blacks of the pupil and the darkest lashes.
Conclusion
Realistic eye drawing is a practice of observation. By focusing on the spherical nature of the eye and the subtle variations in shadow, you can elevate your artwork to a professional level. Add these steps to your gallery to help your audience move from basic sketches to breathtaking portraits.
Keep practicing, keep observing, and most importantly, keep drawing!
Would you like me to generate a specific list of keywords for this article to help with your US-based SEO strategy?


One comment on “The Ultimate Guide to Realistic Eye Drawing: A Step-by-Step Mastery”