Drawing a human eye is often considered the ultimate rite of passage for aspiring artists. It is the “window to the soul,” yet many beginners feel intimidated by its complexity. If you have ever stared at a blank page, wondering how to turn a few lines into a realistic eye, you are in the right place.
The secret to drawing a realistic eye isn’t about having a “natural talent”—it is about breaking the structure down into simple geometric shapes. By understanding the anatomy and mastering a few shading techniques, you can draw a convincing eye in less than 30 minutes.
What You Will Need
Before we start, gather these basic materials:
- Graphite Pencils: A range of hardness (HB for sketching, 2B/4B for shading).
- Drawing Paper: A smooth surface works best for fine details.
- Blending Tool: A paper stump (tortillon) or a soft tissue.
- Eraser: A kneaded eraser is ideal for lifting highlights.
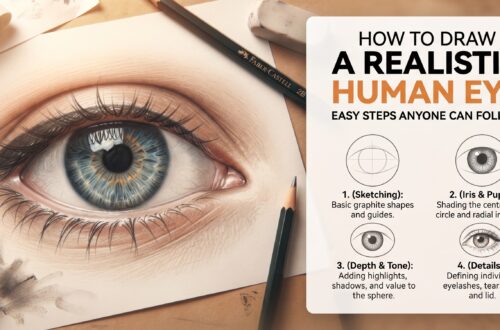
Step 1: Establish the Basic Shape
Most beginners make the mistake of drawing a football shape immediately. Instead, start with a gentle, horizontal curve for the top eyelid.
- Draw a shallow arch.
- Add a smaller, slightly curved line underneath for the bottom lid.
- Pro Tip: Remember that the eye is not perfectly symmetrical. The highest point of the top lid is usually slightly toward the inner corner (near the tear duct).
Step 2: The Iris and Pupil
Think of the iris as a circle, but remember that it is partially hidden by the top eyelid.
- Lightly sketch a circle in the center. Don’t worry if it overlaps the top lid line—this actually makes the drawing look more realistic and relaxed.
- Draw a smaller, solid black circle in the center for the pupil.
- Crucial Detail: Leave a small, unshaded white circle inside the iris/pupil area. This represents the “catchlight” or the reflection of light. This single white dot is what brings the eye to life.
Step 3: Defining the Anatomy
Now, let’s add the surrounding structures to give the eye depth:
- The Tear Duct: Add a small, “v” or “u” shape at the inner corner.
- The Waterline: Draw a thin line along the bottom eyelid. This shows the thickness of the skin and adds 3D volume.
- The Crease: Draw a soft line above the top lid to represent the eyelid fold. This gives the eye its socket structure.
Step 4: Mastering the Shading
Shading is where your drawing transforms from a sketch into a work of art.
- The Iris: Start by shading the outer rim of the iris darkly. Use light, outward strokes to create a “starburst” pattern from the pupil to the edge of the iris.
- The Sclera (White of the eye): It is never truly white! Use a very light pencil stroke to shade the corners of the eyeball. This suggests the curvature of the sphere sitting in the socket.
- The Shadow: Lightly shade under the top eyelid. This creates a cast shadow from the lid onto the eyeball itself, adding immense depth.
Step 5: The Finishing Touches—Lashes and Brows
Many beginners draw eyelashes like spider legs coming straight out of the eye. Avoid this!
- Eyelashes: Eyelashes grow from the edge of the eyelid. They are curved, often clumpy, and vary in length. Draw them in groups of two or three. Flick your pencil upward and outward with a quick motion to get that tapered look.
- Eyebrows: Don’t draw a solid outline for the brow. Use short, light pencil strokes to mimic the direction of hair growth. Brows are thicker at the inner corner and thinner toward the tail.
Common Mistakes to Avoid
- Drawing the eye too large: Keep your proportions in check. In a human face, there is usually exactly one eye-width of space between the two eyes.
- Forgetting the reflection: Without the catchlight, the eye looks dead. Always keep that white spot!
- Over-darkening the sclera: The white of the eye should be the lightest part of your drawing. Use grey tones sparingly.
Practice Makes Progress
Drawing is a skill developed through repetition. Do not be discouraged if your first attempt looks a bit “stiff.” Try drawing an eye from a mirror or a reference photo every day for a week. You will be amazed at how quickly your muscle memory improves.
By focusing on the geometry first and the detail second, you remove the fear of the blank page. Once you master the single eye, you can move on to drawing pairs, and eventually, the full human face.
Keep your pencil sharp, keep your hand light, and enjoy the process of creation. Happy drawing!
Would you like me to provide a step-by-step guide on how to draw the other facial features, such as the nose or lips, next?